The Sunflower Cardigan: A Pattern Adaption
Hello all!
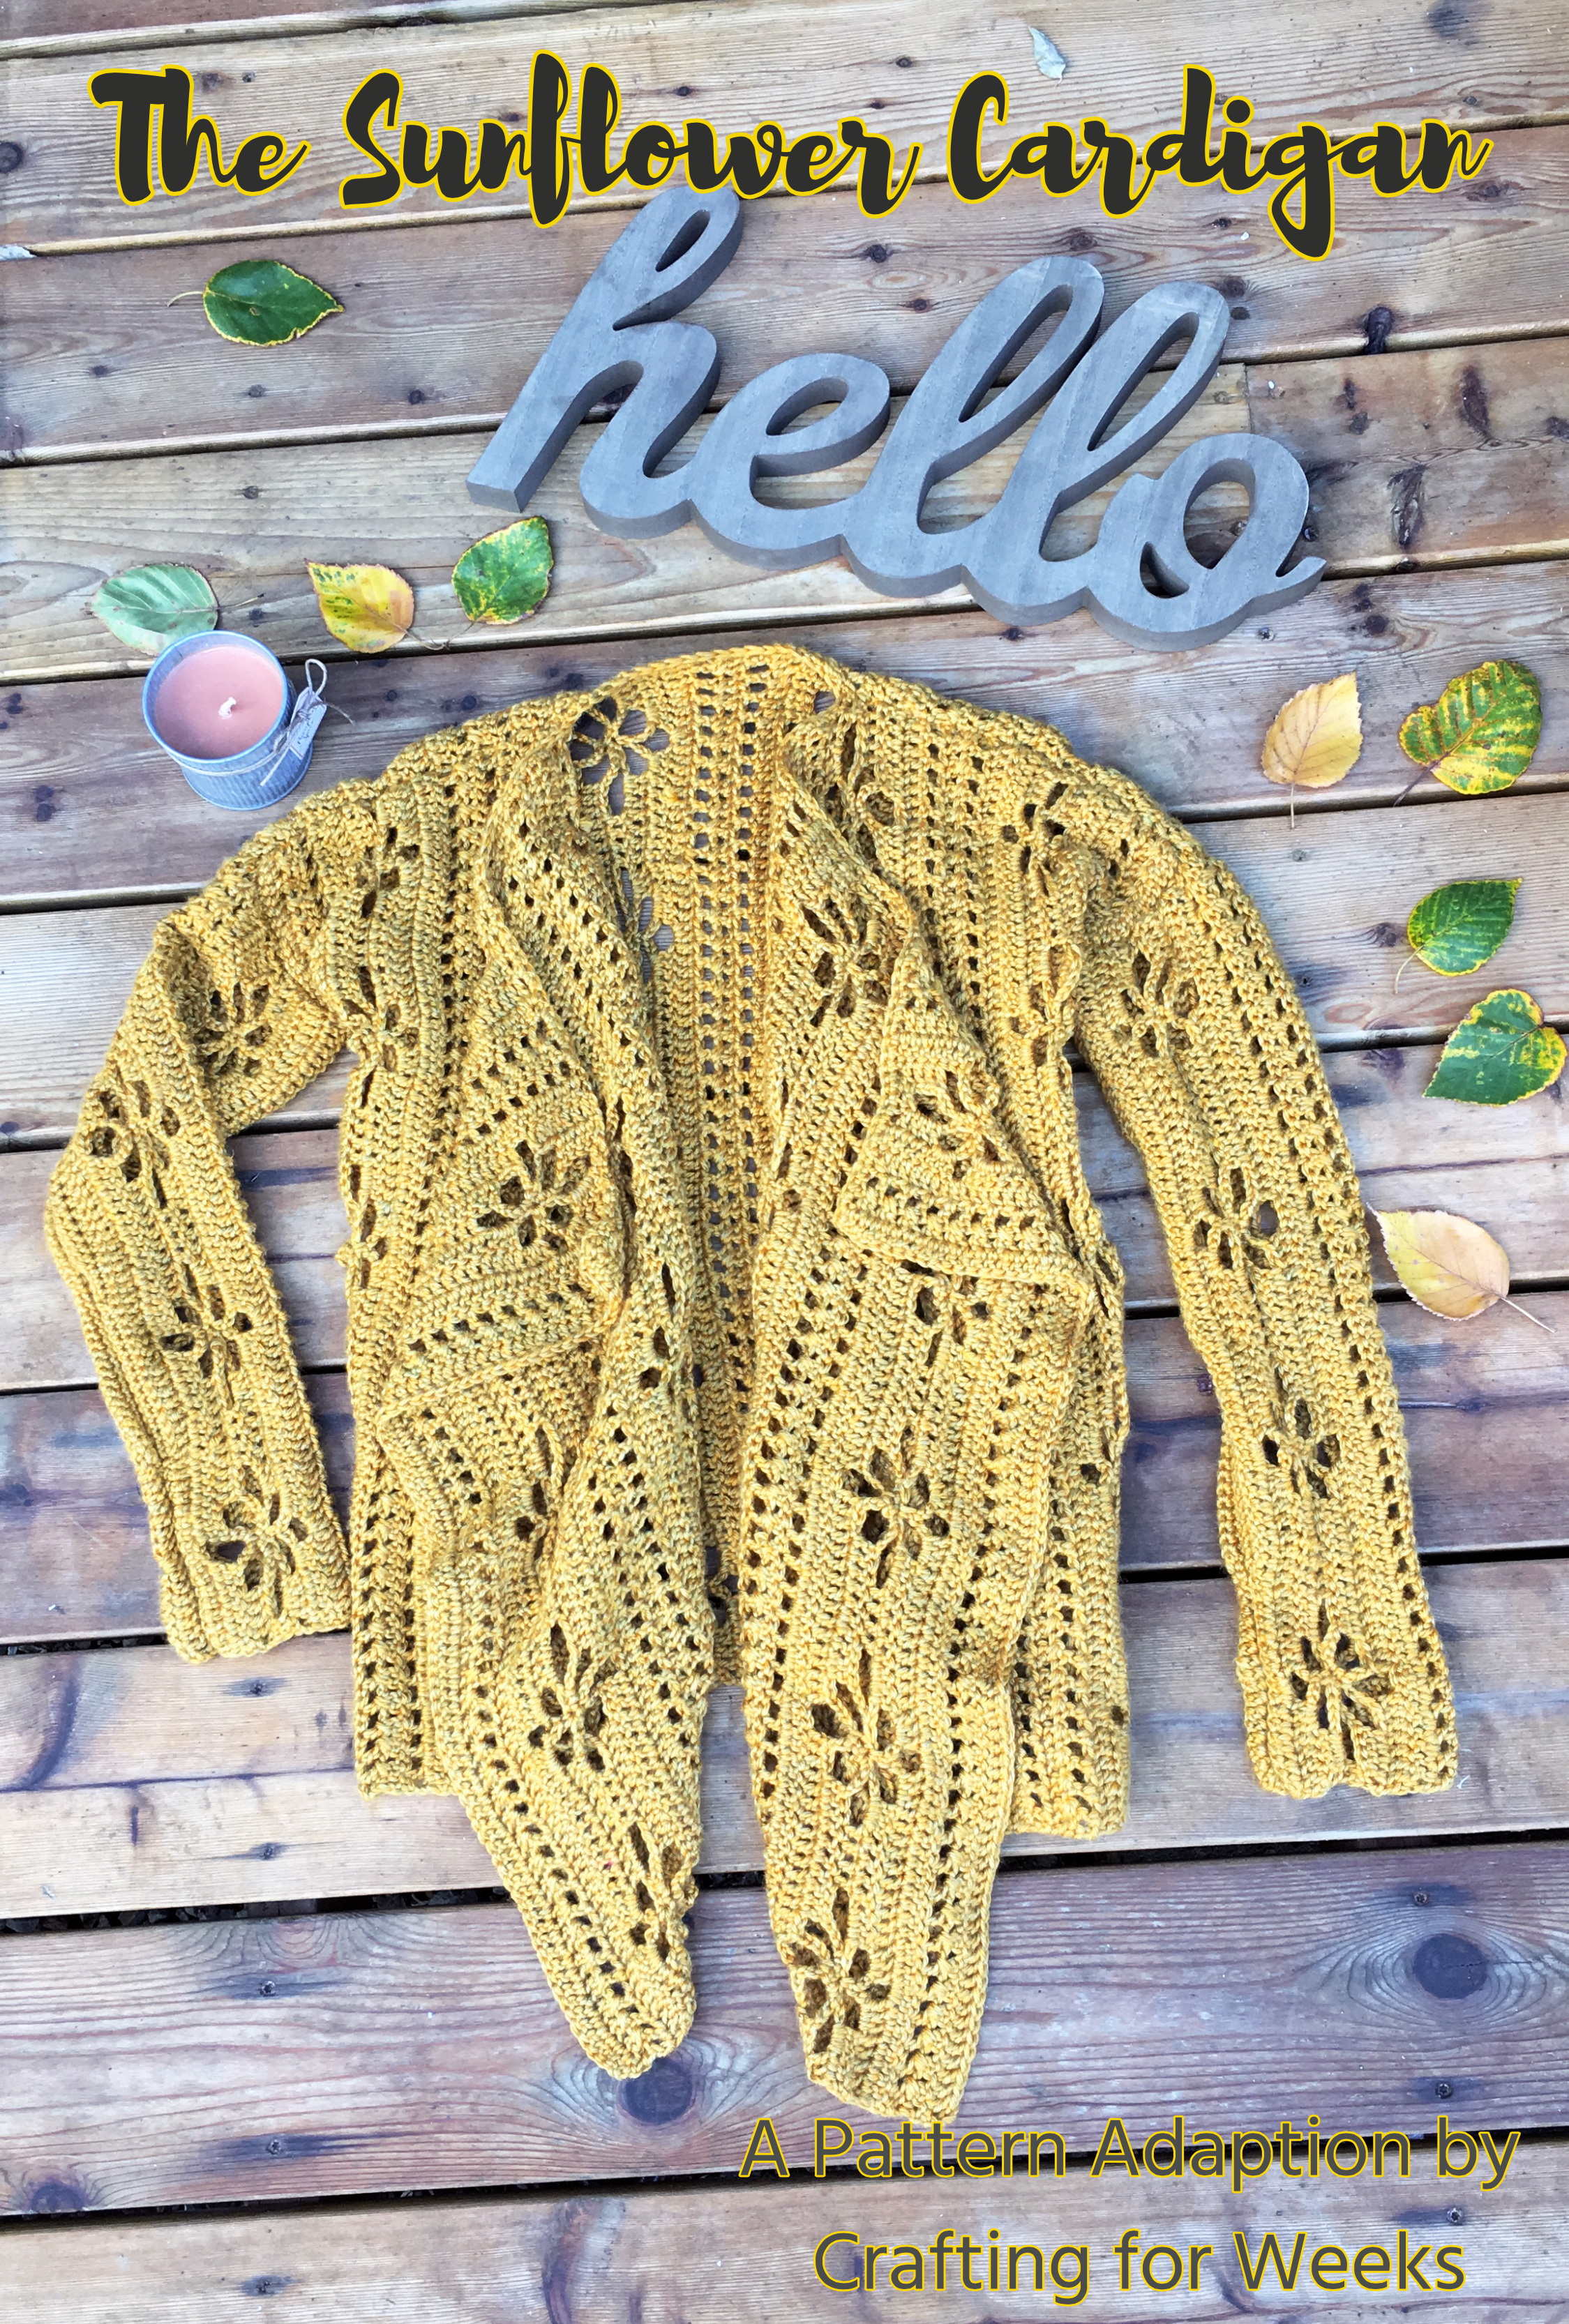
Today I wanted to share a fun pattern adaption I did for my mom for her birthday this year. Now, when I say pattern adaption, that means that I used someone else’s pattern to start and created a different end product. I got this idea from a fellow crocheter from a forum type group, and it turned out so nicely that I decided to write up how I did it. Bear in mind, that because this is an adaption, I will be referring you to the original pattern for a majority of this project and you will find the additions and assembly instructions here. But don’t worry, I’ll include all the links you’ll need to find your way around, so let’s crochet this lovely cardigan!


Now, first things first, the original pattern was done by ChiWei at OneDogWoof. This pattern is an adaption of her Wildflowers Tunic. You can find the free pattern for sizes Small and X-Large here. (If you would like more sizing options you can purchase her pattern on Etsy or Ravelry, or Craftsy.) I will refer to the pattern with the language she uses, but won’t actually be sharing her pattern here on my blog.
So some thoughts before I begin. Now I made this cardigan for a size small/medium, so my sleeves will reflect that sizing. (Note: I will try to walk you through how to size up the sleeves, but I have only tested this for size medium.) I actually purchased the pattern, and found there’s some additional charts included on the purchased version very helpful. So if you get lost, I recommend purchasing the paid version. Its well worth the $3. And finally, I’m going to walk through the steps in this post, but I’ll write out a more concise “pattern” down at the bottom.
(This site contains affiliate links to products. I may receive a commission for purchases made through these links. I will only link products I personally recommend.)
I used Lion Brand Heartland in Yellowstone to make this one. I love the golden yellow color from this yarn and it has flecks of greenish-gray in it. Yellow is totally my mom’s color, so I knew this was the yarn when I first saw it. To make yours, you could use any worsted weight yarn. I used 6 skeins for this sweater with a little leftover (approx 1500yds).

To begin, you will want to make 3 panels according to the Wildflowers Tunic pattern. So for the drape-y version of this sweater, like you see in the photos, you will make the panels exactly according to the pattern; you simply will be making 3 panels instead of 2. If you want your sweater to have a little less drape at the front, shorten 2 of the 3 panels by one Poppy Motif/Spacer Motif repeat.

So once you have 3 completed panels, you’ll need to make some sleeves. The sleeves are started with 72 foundation DC stitches. Then you will do a start the Poppy Motif just as you did in the panels. This will be followed by the Spacer, and finished with the Poppy Motif and finishing rows done in the panels. You should end up with a narrow rectangle with two poppy rows and one spacer row in the center.
Next, you will need to shape the sleeves. Because these sleeves are done vertically, the shaping process is a little different from most sweaters. You will need to add rows along each side of the rectangle you have. It will be wider on one end of the rectangle and gradually get more narrow until you just have the original rectangle size on the opposite end.

To do this you will need to attach yarn on one side of sleeve rectangle. Then DC for 18 stitches, HDC for 18 stitches, SC for 18 stitches, and finish with 1 slip stitch. Then you’ll Ch 1 and turn and skip your slip st, and repeat the pattern in the opposite order, beginning with the SC portion and ending with the DC portion. For a medium sized sleeve, I did a 3 rows like this. Then you will tie off your yarn and weave the ends, and repeat the process on the other side of the rectangle. You’ll need to make sure that you attach your yarn on the same end of the rectangle that you attached on the first side.
When you’re finished, it will look a bit like this. Then you’ll need to fold your work in half lengthwise and stitch the sleeve up using the mattress stitch.

Once you have two completed sleeves and three completed panels, you’re ready to assemble your cardigan.

One panel will be the back of your cardigan; if you chose to make the sweater with less drape, the largest panel will be the back. You will then attach one panel to each side of the back panel using the mattress stitch starting at the bottom of your work an leaving making sure to leave about 10″ opening to attach the sleeves. (I did a quick sketch for you since I didn’t get photos of the assembly process) I find its helpful to use sewing clips to hold my work in place while I stitch.

Once the sides are seamed, you will then stitch the top of the cardigan into place, starting from the corner and working inward for approximately 3″ on either side. I found it was helpful to try the sweater on and see how i wanted it to hang before I tied off the thread.

Next you’ll need to attach the sleeves. If your work has a distinguishable “right side” and “wrong side” then you’ll want to turn the panels and sleeves “wrong side” out before lining them up. Often with mattress stitch, the seams are pretty clean and you won’t have to do this. You’ll line the top shoulder seam up with the center of the Spacer Motif in the sleeve and attach using mattress stitch around. Again, I like to clip my work in place with sewing clips. Repeat for the other sleeve and tie off and weave in ends.

The final working step that I did was to put a row of single crochets along the top edge of the cardigan to help round out the neckline. I found that the rectangular panels gave the sweater a sharp looking neckline. So by adding a row of SC, the points where the seams met were not so pronounced.
I finished it off by blocking it so that the flower shapes were more pronounced.
And with that you should have a lovely sweater, perfect for fall! Hope you all enjoyed, and thanks for reading. Happy Crafting!
Kelsie
SLEEVES
Row 1: Using I (5.5mm) hook, foundation dc 72 stitches.
Row 2: Chain 3 and turn. Crochet across using crossed dc (see original Wildflowers tunic pattern for reference*).
Row 3: Ch 3 and turn. Crochet across using mesh (*)
Row 4: Ch 3 and turn. Dc across.
Row 5 – 10: Poppy motif (*)
Row 11 – 14: Spacer motif (*)
Row 15 – 20: Poppy motif (*)
Row 21: Ch 3 and turn. Crochet across using mesh (*)
Row 22: Ch 3 and turn. Crochet across using crossed dc
Row 23: Ch 3 and turn. Dc across. (finishes sleeve rectangle)
Row 24: Ch 3 and turn. Dc 17 (ch 3 counts as first stitch), hdc 18, sc 18, sl stitch in next stitch.
Row 25: Ch 1 and skip slip stitch. Sc 18, hdc 18, dc 18 (Note: stitches should be on top of their corresponding stitches from previous row.)
Row 26: Ch 3 and turn. Dc 17 (ch 3 counts as first stitch), hdc 18, sc 18, sl st. Fasten off and weave in ends.
(Note: For large sizes continue adding rows in this manner until the sleeve is the appropriate width. Depending on size needed, you may need to add 36 SC instead of 18 SC to widen sleeves at the wrist.)
Attach yarn to the opposite side of sleeve rectangle. Should be the same end of rectangle that you began Dc in Row 24.
Repeat Row 24-26.
Finishing: Fold the work in half lengthwise and seam up using the mattress stitch.
Make 2 sleeves.
ASSEMBLY INSTRUCTIONS
- Lay the 3 panels side by side with rows lining up vertically.
- Attach the edges of each panel, starting at the bottom using the mattress stitch. Leave approximately 10″ (or large for bigger sleeves) opening on the top portion of the panels.
- Fold the two outside panels in towards the center so that the top corners align. Starting at the right panel corner, sew a seam approximately 3″ towards the center using the mattress stitch. Repeat with left panel corner.
- Line up the sleeves with the center of the spacer motif meeting the top shoulder seam. Attach sleeves using mattress stitch.
FINISHING
Attach yarn to the top corner of right panel. Sc across panel, neckline, and opposite panel. Fasten off and weave in ends. Block your work.


