The XOXO Stocking: A Free Crochet Pattern
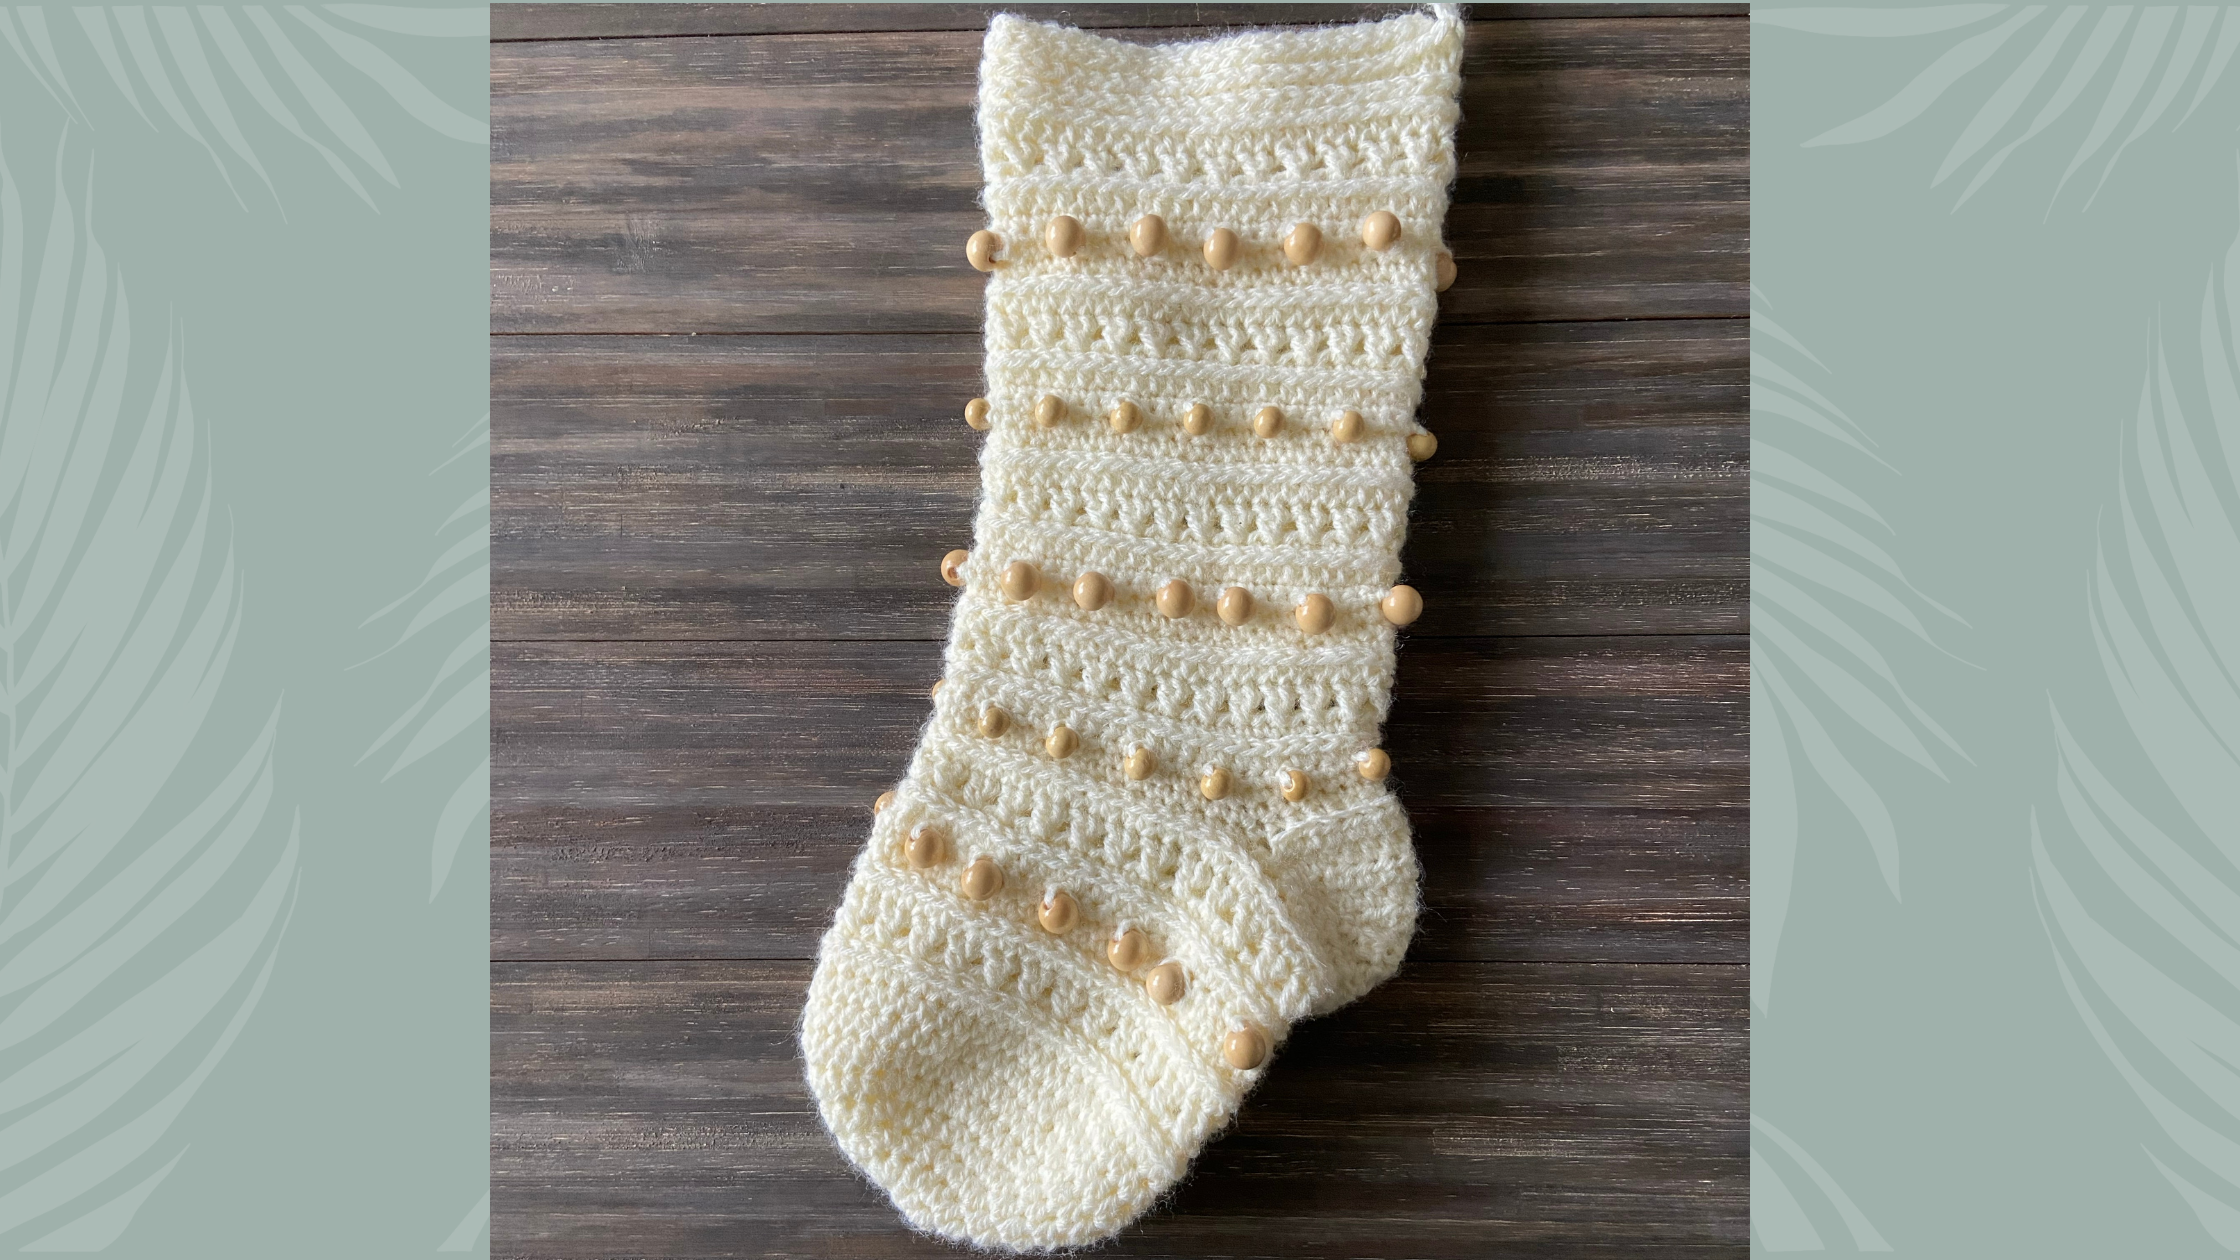
Hey there friends! I’m glad you dropped in to check out this super fun pattern. Today I’ve got a really cool crochet stocking for you. I love this one because its so versatile! It can be boho chic with some neutral yarn and wooden beads. Or it can be whimsically fun with some bright yarn and rainbow bauble beads. It can also just be a really fun stocking with loads of texture. Whatever your style is, I think you’re gonna love the XOXO Stocking.

The following is a free pattern available for use on my website. If you would like to purchase a detailed, ad-free PDF version of this pattern, please visit my Etsy or Ravelry shop. All rights reserved.
**This site contains affiliate links to products. I may receive a commission for purchases made through these links. This is a great way to support my small business AND get the supplies you need for your project!**
About the XOXO Stocking
The XOXO Stocking is a really fun, textured crochet stocking. This stocking uses the same stitch combination as the other pieces in the XOXO Collection. It uses crossed stitches and bobbles to make X’s and O’s. One fun twist on this pattern is that the bobble stitches are interchangeable with beads!
And just for fun, I designed this stocking in two sizes. There’s standard size and an oversized stocking in this pattern. I had just about finished the pattern and decided, Hey why not make a huge one too?! The oversized one is quite an undertaking, but if you like a big eye-catching stocking display, this is the one for you.

About the Yarn
The XOXO Stocking is designed with worsted weight yarn. For my samples, I decided to do some stash-busting and used some Pound of Love yarn from Lion Brand. It’s not my favorite yarn to work with, but it’s definitely economical, especially if you’re making several items of the same color. It’s a little on the lighter side of worsted weight, so your finished stocking might come out just a tad larger than mine, but the fun thing about Christmas stockings is that they can be whatever size you want them to be!
If you’re looking for some suggestions on worsted weight yarn, I’d definitely throw Brava worsted from WeCrochet out there as a great option. I designed my Rustic Pines Stocking with this yarn and it came out fabulous. One thing that I love about this yarn is all the colors. My biggest selling point on a yarn is if I can find it in the colorway I want, so for that reason, and the fact that it’s very budget-friendly, Brava definitely stays high on my favorites list.
Love it?! Pin it for Later!

About the Stitches
There’s a few different stitches that I used across the entire XOXO Collection. I’ll give you a quick list to see if you know them already. If so, just skip ahead to the pattern! But for this stitch combo we are going to be using: crossed dc, camel stitch, bobble stitch, and optional adding beads.
Crossed Double Crochet
So the first special stitch is super simple. It hardly requires an explanation, but I’ll give you a quick one anyway. When you’re working crossed double crochet, you will skip a stitch and then work a double crochet. Then you will work your next double crochet into the stitch that you skipped. This creates a criss-cross effect.

Bobble Stitch
Next up is the bobble stitch. Now, I’ve seen a lot of different ways to do a bobble stitch. I use small bobbles in this pattern, but if you like bigger ones, then by all means, go for it! To do a bobble stitch, you’re going to yarn over, insert your hook into the stitch and pull up a loop. Yarn over and pull through two loops on your hook. Great! Now repeat that two more times. You should end up with four loops on your hook. Yarn over and pull through all four. And that’s it! Some people like to chain 1 to close their bobbles. I don’t bother in this pattern, but you definitely can if you like the look.


Camel Stitch
And finally, the camel stitch; also know as crochet in the 3rd loop. This stitch can only be worked when there is a row of half double crochets beneath it and is best worked in the round. So it will always begin with a row of half double crochet followed by whatever stitch you’re working in the 3rd loop of the half double crochet stitch. Essentially, when you look at the stitch, you should see the front loop and back loop along the top of your stitches. Right behind the back loop, running along the back of your work, is the 3rd loop. By crocheting into this loop, you will push the front loop and back loop forward creating a line of texture.

Adding Beads to Crochet
This pattern has an option to swap those bobble stitches for beads. Adding a bead is super simple, and I wrote up a whole tutorial for it awhile back complete with a photo tutorial and video. You can check it out here! I’ll stick the video down below. You should be aware that you’ll need a hook that is small enough to fit through your beads of choice to do this technique. And if your beads are too small, you might have some trouble getting the yarn through them. I’ve found that anything smaller than 10mm can be a struggle for worsted weight yarn.
As for where to get the beads, I have found wooden beads at most crafts stores. The round beads from the video below are from Hobby Lobby. You can pretty much use whatever you’d like as long as the hole can fit a small crochet hook through it.
Materials Needed
(250,500) of Worsted Weight yarn
Size I (5.5mm) crochet hook
Size J (6.0mm) crochet hook
Beads (optional)
Crochet hook small enough to thread beads (optional)
Tapestry needle
Stitch Marker
Scissors
Stitches Used
MC – Magic Circle
Ch – Chain
Sc – Single Crochet
Sc in BLO – Single Crochet in Back Loops Only
Hdc – Half Double Crochet
Hdc Inc – Half Double Crochet Increase
Hdc2Tog – Half Double Crochet Two Together
Dc – Double Crochet
Bobble – Bobble Stitch
Skill Level
Experienced Beginner
Gauge
18 st x 14 rows hdc = 4” square
Finished Measurements:
Standard: 5.5”w x 15”h
Oversized: 8”w x 24”h
Notes
- This pattern is worked in the round. It is recommended that you use a stitch marker to mark the first stitch of the round.
- This pattern is broken down into sections. If you are told to repeat a Round, it is the Round from the section that you are working in.
- Some shorthand is used in this pattern. 2 hdc means to work two hdc in the same stitch. Hdc 2 means to work to one hdc in each of the next two stitches.
- This stocking is written in two sizes (Standard, Oversized).
- Rounds with Bobbles/Beads are worked differently depending on which option you choose.
- Beads are a choking hazard for children.
PATTERN
TOE
With 5.5mm hook, begin with a magic circle.
Round 1: Hdc 8 in the magic circle. Sl st to first hdc to join. (8,8)
Round 2: 2 Hdc in each stitch around. Sl st to first hdc to join. (16,16)
Round 3: *Hdc, 2 hdc in next stitch.* Repeat from * to * around. Sl st to first hdc to join. (24,24)
Round 4: *Hdc 2, 2 hdc in next stitch.* Repeat from * to * around. Sl st to first hdc to join. (32,32)
Round 5: *Hdc 3, 2 hdc in next stitch.* Repeat from * to * around. Sl st to first hdc to join. (40,40)
Round 6: *Hdc 4, 2 hdc in next stitch.* Repeat from * to * around. Sl st to first hdc to join. (48,48)
For standard size stocking, stop increasing here and move onto Round 9.
Round 7: *Hdc 5, 2 hdc in next stitch.* Repeat from * to * around. Sl st to first hdc to join. (-,56)
Round 8: *Hdc 6, 2 hdc in next stitch.* Repeat from * to * around. Sl st to first hdc to join. (-,64)
Round 9-11: Hdc in each stitch around. Sl st to first hdc to join. (48,64)
For standard size, move onto Arch after Round 11.
Round 12-13: Hdc in each stitch around. Sl st to first hdc to join. (-,64)
Move onto Arch section
ARCH
Round 1: Ch 1. Working in third loops around (Camel Stitch), sc in each ch around. Sl st in first stitch to join. (48,64)
Round 2: Ch 2. *Sk next stitch. Work 1 dc in following stitch. Work 1 dc in previous skipped stitch working over previous dc. (Crossed DC).* Repeat from *to* around. Sl st in top of Ch 2 to join. (48,64)
Round 3: Ch 1. Hdc in first stitch and each stitch around. Sl st in first stitch to join. Sl st in first stitch to join. (48,64)
Round 4: Ch 1. Working in third loops around, sc in each stitch around. Sl st in first stitch to join. (48,64)
Round 5: Ch 1. Sc in first stitch and each stitch around. Sl st in first stitch to join. (48.64)
For Bobbles:
Round 6: Ch 1 and TURN. Working on wrong side (WS), 1 sc in the last stitch of previous row. Bobble in next stitch. *Sc in next 3 stitches. Bobble in next stitch.* Repeat from *to* until 3 stitches remain. Bobble in next stitch. Sc in next 2 stitches. Sl st first stitch to join. (48,64)
Round 7: Ch 1 and TURN. Resume working on right side (RS), Sc in first stitch and each stitch around. Sl st in first stitch to join. (48,64)
For Beads:
Round 6: Ch 1. Sc in each of the first two stitches. *Add a bead. Sc in each of the next 4 stitches. * Repeat from *to* until two stitches remain. Add a bead. Sc in each of the last two stitches. Sl st in first sc to join. (48 stitches/12 beads, 64 stitches/16 beads)
Round 7: Ch 1 and TURN. Working on wrong side (WS), sc in first stitch and in each stitch around. (48,64) Turn to right side (RS) before working Round 8.
Round 8: Ch 1. Hdc in first st and in each stitch around. Sl st in first stitch to join. (48,64)
Round 9: Ch 1. Sc in third loop of first hdc in previous row (Camel Stitch). Working in third loops, sc in each stitch around. Sl st in first stitch to join. (48,64)
Round 10: Repeat Round 2
Round 11: Repeat Round 3
For standard size, move onto Heel after Round 11.
Round 12-17: Repeat Round 4-9
Round 18: Repeat Round 2
Move onto Heel section.
HEEL
Row 1: Ch 1. Working in 3rd loops, Hdc (20,26). (20,26)
Row 2: Ch 1 and turn. Hdc2tog, hdc (16,22), hdc2tog. (18,24)
Row 3: Ch 1 and turn. Hdc2tog, hdc (14,20), hdc2tog. (16,22)
Row 4: Ch 1 and turn. Hdc2tog, hdc (12,18), hdc2tog. (14,20)
Row 5: Ch 1 and turn. Hdc2tog, hdc (10,16), hdc2tog. (12,18)
For standard size, move onto Row 7.
Row 6: Ch 1 and turn. Hdc2tog, hdc (-,14), hdc2tog. (-,16)
Row 7: Ch 1 and turn. Hdc across. (12,16)
For standard size, move onto Row 9.
Row 8: Ch 1 and turn. 2 Hdc in first st, hdc (-,14), 2 hdc in last st. (-,18)
Row 9: Ch 1 and turn. 2 Hdc in first st, hdc (10,16), 2 hdc in last st. (14,20)
Row 10: Ch 1 and turn. 2 Hdc in first st, hdc (12,18), 2 hdc in last st. (16,22)
Row 11: Ch 1 and turn. 2 Hdc in first st, hdc (14,20), 2 hdc in last st. (18,24)
Row 12: Ch 1 and turn. 2 Hdc in first st, hdc (16,22), 2 hdc in last st. (20,26)
Round 11: Ch 1 and turn. Sc in BLO in each stitch across. Then fold heel flap in half and begin working in next stitch from Arch. Working in third loops, sc in each stitch around. Sl st to first sc on the edge of the heel flap. (48,64)


Move on to Body. We will complete the heel seaming in Finishing.
BODY
Round 1: Ch 1. Sc in first stitch and each stitch around. Sl st in first stitch to join. (48.64)
For Bobbles:
Round 2: Ch 1 and TURN. Working on wrong side (WS), 1 sc in the last stitch of previous row. Bobble in next stitch. *Sc in next 3 stitches. Bobble in next stitch.* Repeat from *to* until 3 stitches remain. Bobble in next stitch. Sc in next 2 stitches. Sl st first stitch to join. (48,64)
Round 3: Ch 1 and TURN. Resume working on right side (RS), Sc in first stitch and each stitch around. Sl st in first stitch to join. (48,64)
For Beads:
Round 2: Ch 1. Sc in each of the first two stitches. *Add a bead. Sc in each of the next 4 stitches. * Repeat from *to* until two stitches remain. Add a bead. Sc in each of the last two stitches. Sl st in first sc to join. (48 stitches/12 beads, 64 stitches/16 beads)
Round 3: Ch 1 and TURN. Working on wrong side (WS), sc in first stitch and in each stitch around. (48,64) Turn to right side (RS) before working Round 4.
Round 4: Ch 1. Hdc in first st and in each stitch around. Sl st in first stitch to join. (48,64)
Round 5: Ch 1. Sc in third loop of first hdc in previous row (Camel Stitch). Working in third loops, sc in each stitch around. Sl st in first stitch to join. (48,64)
Round 6: Ch 2. *Sk next stitch. Work 1 dc in following stitch. Work 1 dc in previous skipped stitch working over previous dc. (Crossed DC).* Repeat from *to* around. Sl st in top of Ch 2 to join. (48,64)
Round 7: Ch 1. Hdc in first stitch and each stitch around. Sl st in first stitch to join. Sl st in first stitch to join. (48,64)
Round 8: Ch 1. Working in third loops around, sc in each stitch around. Sl st in first stitch to join. (48,64)
Repeat Repeat Rounds 1-8 (2,5) more times.
Repeat Repeat Rounds 1-7 one more time.
CUFF
Switch to 6.00mm hook.
Round 1: Working in third loops, hdc in each stitch around. Sl st to first hdc to join. (48,64)
For standard size, skip to Round 3.
Round 2: Repeat Round 1
Round 3: Working in thirds loops, hdc (12,13). Ch 12. Continuing in third loops, hdc in next stitch and each stitch around. Sl st to first hdc to join. (48,64 +12 chains)
Note: Chain 12 creates a loop to hang stocking. For longer hanging loop, chain more stitches
Round 4-5: Repeat Round 1
For standard size, fasten off and move onto Finishing.
Round 6: Repeat Round 1
Fasten off and move onto Finishing.
FINISHING
- Turn Stocking inside out.
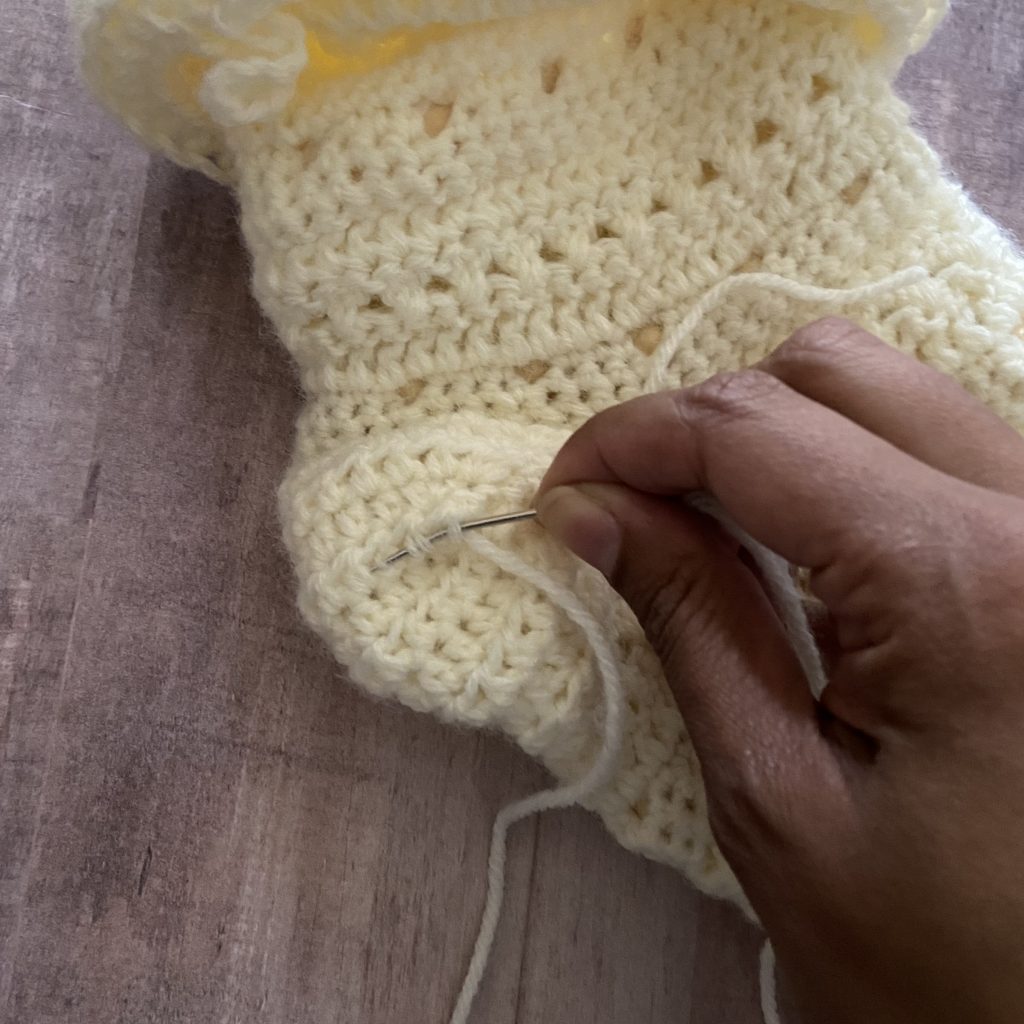
- Attach yarn to one edge of the heel gap. Using a tapestry needle, whip stitch the edges of the heel closed.
- Without breaking yarn, use the tapestry to pass the yarn through the stitches at the back of the heel to the opposite heel gap.
- Whip stitch the opposite side of the heel closed.
- Weave in all ends and turn stocking right side out.
- Optional: Make a tassel and tie it to you hanging loop for decoration.


Final Thoughts
I hope you have a ton of fun making this stocking! I’d love to see your finished makes so be sure to tag me on social media @craftingforweeks on Facebook or Instagram. And use the hashtag #xoxostocking on your finished make too!
Until next time, Happy Crafting!


