How to Crochet a Slouchy Beanie
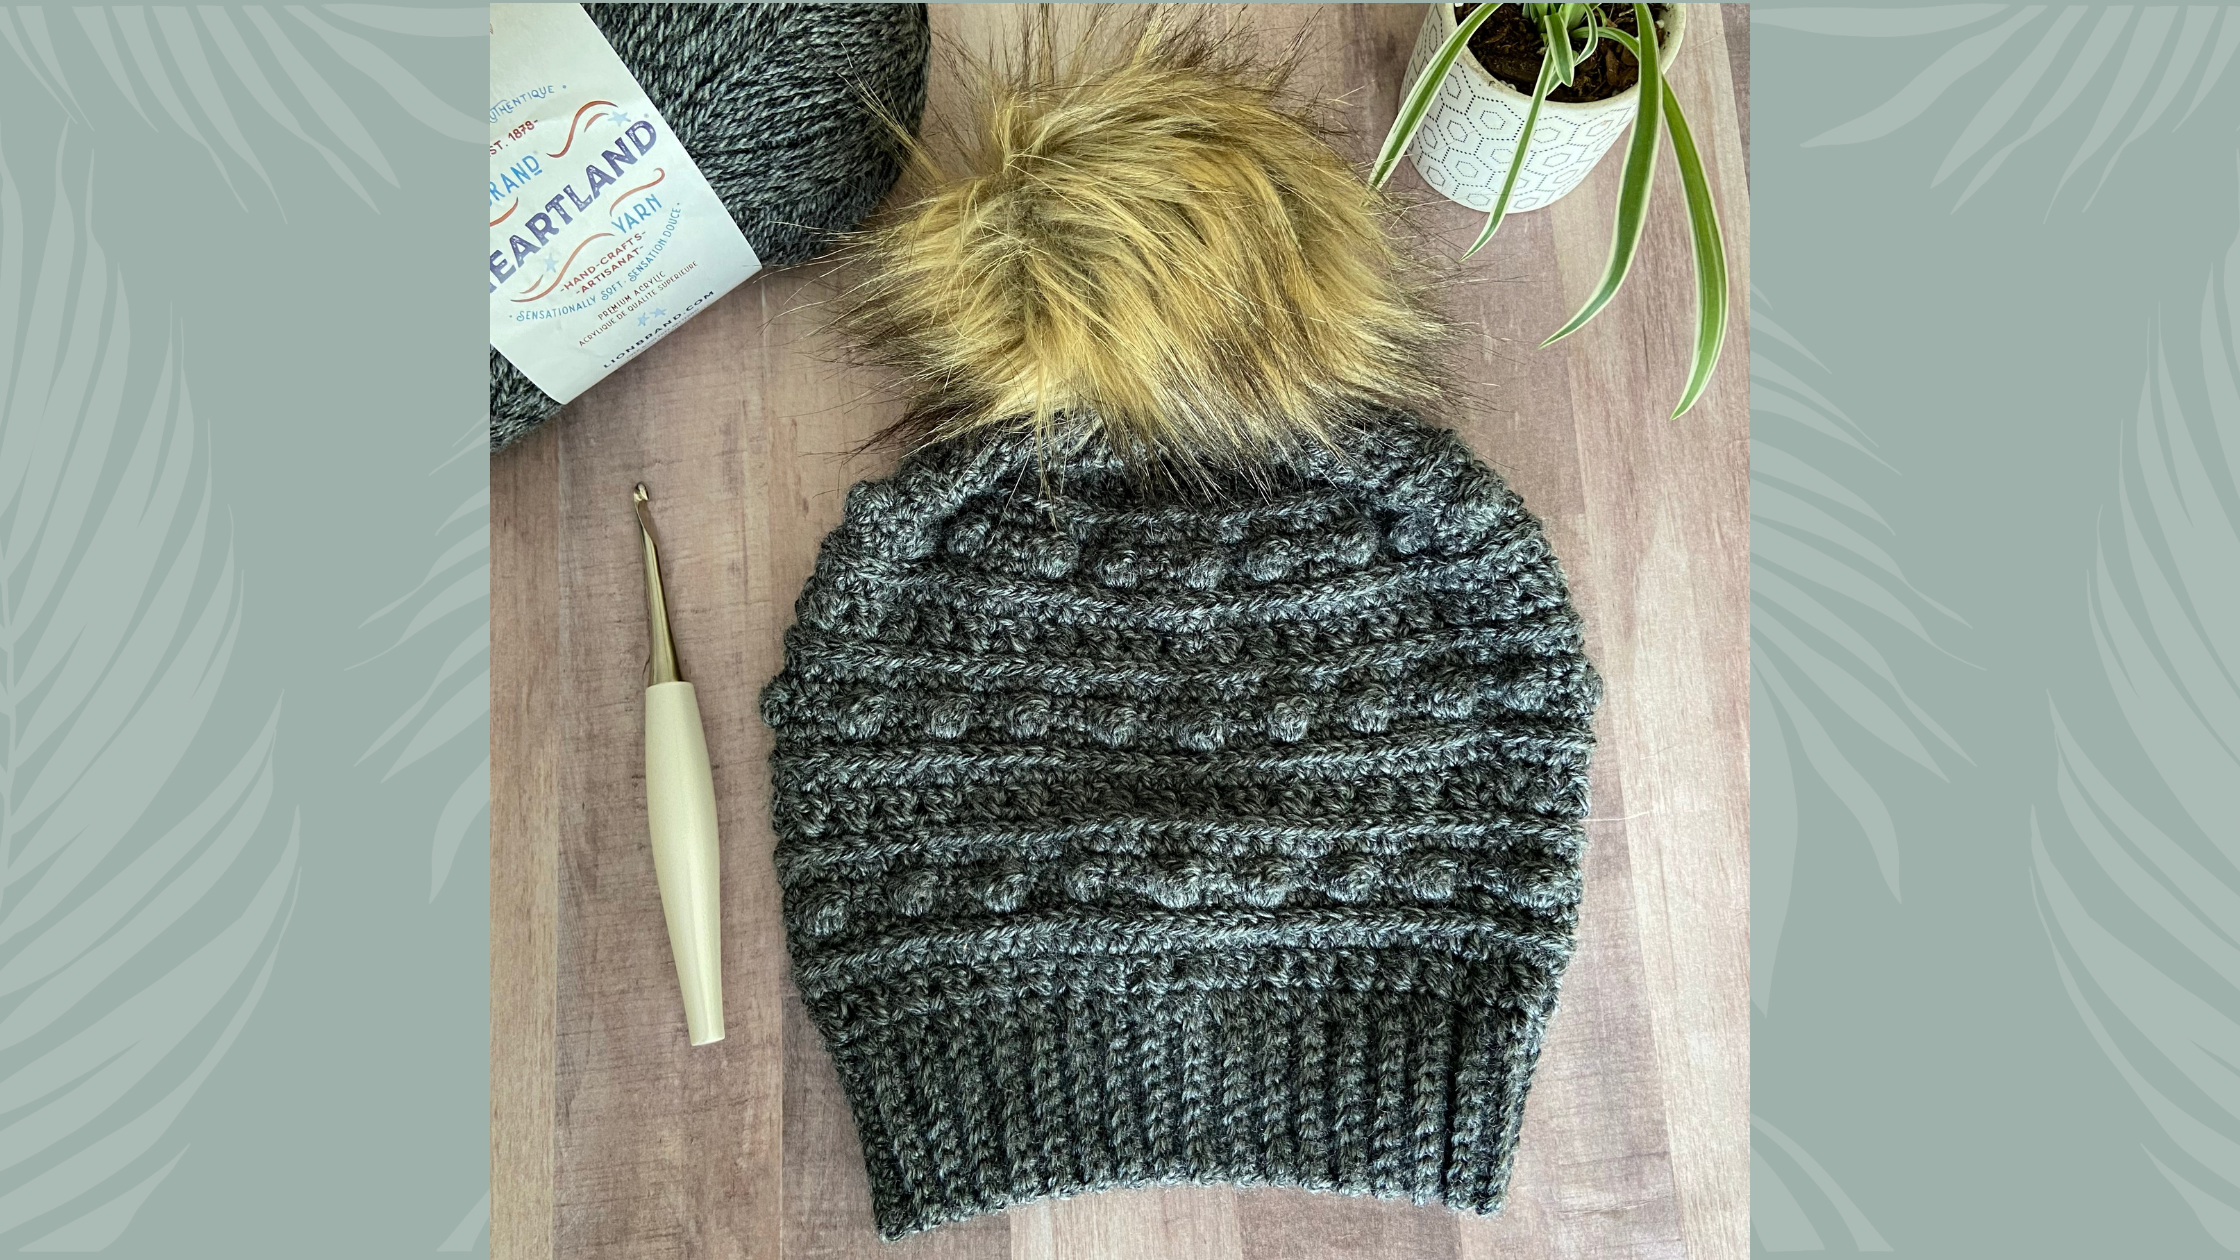
I’m really excited to share a new beanie pattern with you all today. I’ve been working on this one for a couple weeks now, and it feels so good to finally hit publish. It seems like each year has its own trends in winter hats. But textured beanies always seem to be really popular, which is great, because I love working with texture. I put a fun little twist on this crochet slouch hat pattern by writing it so that you can make it with yarn bobble or you can add beads! I hope you all enjoy the XOXO Slouch Hat.

The following is a free pattern available for use on my website. If you would like to purchase a detailed, ad-free PDF version of this pattern, please visit my Etsy or Ravelry shop. All rights reserved.
**This site contains affiliate links to products. I may receive a commission for purchases made through these links. This is a great way to support my small business AND get the supplies you need for your project!**
The Inspiration
One of my favorite style of beanies is worked from the brim up. When I began designing this hat, I knew I wanted to add texture along the way. So I picked a few fun stitches and decided to break them up with a camel stitch.
When I was choosing stitches for this crochet slouch hat, I settled on the Crossed DC because its one of my favorite textured stitches. I knew I wanted to be able to add beads, so the bobble stitch seemed like a natural alternative for that. With the crossed stitches and round bobbles, it definitely reminded me of X’s and O’s, hence the name XOXO Slouch Hat.

About the Stitches
There’s a few special stitches involved in making the XOXO Slouch Hat, along some fun modification options. One cool option I included was how to add a few rows of beads to your crochet slouch hat. There’s some more about beads below, but first let’s talk about the stitches on this beanie.
Bobble Stitch
The first stitch we’re gonna go over will be the bobble stitch. There’s a couple variations to the bobble stitch. For this pattern, you will be using a smaller bobble (although you can use a larger bobble if you’d like!). This is done by only pulling up 3 loops before you complete your stitch. Larger bobbles often use 4 or more loops.
Yarn over, pull up a loop, yarn over, pull through two loops. Repeat 2 more times (there should be 4 loops on your hook). Yarn over and pull through all 4 loops. Push your bobble to the front of your work.

Crossed DC Stitch
There’s a few more textural stitches that I used for this crochet slouch hat. As I mentioned before, I used the Crossed DC, which is essentially criss-crossing double crochet stitches. You do this by skipping a stitch and working a DC in the next stitch. Then you go back and work a DC in the previous space.

Camel Stitch
The other texture stitch I used was the sc camel stitch. Now I have to be honest, I initially struggled with learning the camel stitch, but once I got the hang of it, its easy peasy. Basically, when you have a row of HDC stitches, each stitch will have a third loop or bar that runs along the back of the stitch. Instead of inserting your hook through the top of the stitch (beneath the front and back loops) as you normally would, you will work in the loop behind those (the camel’s “hump”). Working behind the front and back loops will push the top of your stitches forward creating a ridge-like texture in your work. It took me a bit to get used to seeing “the hump”, but you’ll get the hang of it quickly. If you need a little more help, check out this video tutorial.

Adding Beads to Crochet
I wrote post showing how to add beads to crochet, without stringing them ahead of time. If you’re interested in the beaded version of this hat, I definitely recommend you check that post out here to get a feel for the technique. You can also watch the video below for more help!
Thoughts on the Pattern
So now that you have an idea of the the stitches you’ll need to know, you’re ready to go! As you work, be aware that Rows 6 and 7 will vary slightly depending on whether you want to do beads or bobbles. So make sure to pay attention to variation you’re working on.
Another fun thing to do it to work with a mixture of colors. Using a contrasting color yarn for the crossed dc’s and the bobble stitches give a really fun pop of color to your project.
Make a Matching Set!
Since the release of the XOXO Slouch Hat, I’ve added several more items to the XOXO Collection. If a beanie is just not your thing, you might love the XOXO Earwarmer instead! And if you are needing some extra warmth, try out the XOXO Cowl! This textured scarf is one of the most popular patterns on my blog! And don’t forget to wrap up the set with some XOXO Mitts!

Love it?! Pin it for Later!

Materials Needed:
1 Skein Worsted weight (4) yarn, approx. 160 – 200 yds
5.0mm (H) Crochet hook
5.50mm (I) Crochet hook
1.5mm (size 8) Crochet hook (optional)
Beads (6mm, 8mm, 10mm) (optional)
Pom Maker or faux fur pom (optional)
Large Button (optional)
Tapestry needle
Gauge
With I Hook: Ch 17, turn. SC 16 stitches across. Ch 2 and turn, Crossed DC across. Ch 1 and turn, HDC across. Ch 1 and turn, Sc in third loops across. Ch 1 and turn, Sc across. Ch 1 and turn, SC 1, Bobble, sc 3, bobble, sc 3, Bobble, Sc 3, Bobble, sc 2. Ch 1 and turn, sc across.
Finished Measurements (laid flat)
Newborn – 5.25” across, 5.25” high
0-6 Months – 6.25″“ across, 6” high
6-12 Months – 7” across, 6.5” high
12-24 Months — 8” across, 8” high
Child 3-5 yrs – 8.25” across, 8.25” high
Child 6-10 yrs – 8.75” across, 9” high
Adult Sm/Md – 9.25” across, 10” high
Adult Lg – 9.75” across, 10” high
Notes
- Chain spaces do not count as stitches in stitch count.
- Roundss 6 and 7 will be worked differently based whether you are adding bobble stitches or beads
- Beads are a choking hazard for young children and not recommended for hats made for children under the age of 4
- Sizes are written as follows (NB, 0-6 Mo, 6-12 Mo, 12-24 Mo, Toddler, Child, Adult Sm/Md, Adult Large)
PATTERN
Band
Row 1: With Size H (5.0mm) hook, Ch (5,7,7,9,9,9,11,11), then sc in 2nd ch from hook and each ch across. (4,6, 6, 8, 8, 8, 10, 10)
Row 2: Ch 1 and turn. Working in back loops only (BLO), sc in first stitch and each stitch across. (4,6, 6, 8, 8, 8, 10, 10)
Repeat Row 2 until brim has a total of (40,48,52,60,64,68,72,76) rows.
Holding ends together, sl st in each stitch across both pieces to close band. Do not break yarn.
Turn band so slip stitches are facing inward and working yarn is on top.
Hat
Round 1: Switch to Size I (5.5mm) hook. With working loop from band, Ch 1, then sc 1 in each row around the top edge of brim. Sl st in top of first sc to join. (40,48,52,60,64,68,72,76)
Round 2: Ch 3 (does not count as stitch). *Sk next stitch. Work 1 dc in following stitch. Work 1 dc in previous skipped stitch working over previous dc. (Crossed DC).* Repeat from * to * around. Sl st in top of Ch 3 to join. (40,48,52,60,64,68,72,76)
Round 3: Ch 1. Hdc in first stitch and each stitch around. Sl st in first stitch to join. (40,48,52,60,64,68,72,76)
Round 4: Ch 1. Sc in third loop of first hdc in previous row (Camel Stitch). Working in third loops, sc in each stitch around. Sl st in first stitch to join. (40,48,52,60,64,68,72,76)
Round 5: Ch 1. Sc in first stitch and each stitch around. Sl st in first stitch to join. (40,48,52,60,64,68,72,76)
[Note: Rounds 6 – 7 will be slightly different depending on whether you are using bobbles or beads. Resume working the pattern the same for both variations at Round 8.]
For Bobbles:
Round 6: Ch 1 and TURN. Working on wrong side (WS), 1 sc in the last stitch of previous row. Bobble stitch (BS) in next stitch. *Sc in next 3 stitches. BS in next stitch.* Repeat from * to * until 3 stitches remain. BS in next stitch. Sc in next 2 stitches. Sl st first stitch to join. (40,48,52,60,64,68,72,76)
Round 7: Ch 1 and TURN. Resume working on right side (RS), Sc in first stitch and each stitch around. Sl st in first stitch to join. (40,48,52,60,64,68,72,76)
For Beads:
Round 6: Ch 1. Sc in each of the first two stitches. *Add a bead. Sc in in each of the next 4 stitches.* Repeat from * to * until two stitches remain. Add a bead. Sc in each of the last two stitches. Sl st in first sc to join. (40,48,52,60,64,68,72,76)
Round 7: Ch 1 and TURN. Working on wrong side (WS), sc in first stitch and in each stitch around. (40,48,52,60,64,68,72,76)
Note: Turn to right side (RS) before working Row 8.
Round 8: Ch 1. Hdc in first st and in each stitch around. Sl st in first stitch to join. (40,48,52,60,64,68,72,76)
Round 9: Ch 1. Sc in third loop of first hdc in previous row (Camel Stitch). Working in third loops, sc in each stitch around. Sl st in first stitch to join. (40,48,52,60,64,68,72,76)
Rounds 10: Repeat Round 2
(For Newborn size, skip to Round 27.)
Rounds 11-12: Repeat Rounds 3-4
(For 0-6 Month size, skip to Round 27.)
Rounds 13-17: Repeat Rounds 5-9
(For 6-12 Months, skip to round 27. To make an adult fitted hat instead of a slouch hat, Skip to Row 26)
Rounds 18-20: Repeat Row 2-4
(For 12-24 Months and Child 3-5 yrs, Skip to Row 26)
Rounds 21-25: Repeat Round 5-9
Round 26: Ch 1, *Hdc2tog, Hdc in next stitch*. Repeat from * around. Slip stitch in first stitch to join.
Rounds 27-29: Ch 1, *Hdc2tog, Hdc in next stitch*. Repeat from * around. Slip stitch in first stitch to join.
Tie off leaving long tail.
Tie off leaving long tail. Using tapestry needle, weave tail through the top stitches and cinch the top closed. Secure top of hat closed.
Attaching Pom
Using a pom maker, wrap yarn around each side of pom maker. Cut yarn around edges of pom maker and secure pom with yarn or crochet thread with a knot, leaving long tails to attach pom to hat.
Alternatively, you can make or purchase a faux fur pom. To learn how to make a faux fur pom, check out this tutorial.
To make pom removable, stitch a large 4-hole button to the top inside of hat using the leftover tail from closing hat. Be sure to only use two of the holes. Thread the tails of the pom through the top of hat to the inside. Then thread the tails through the other two holes of the large button using the tapestry needle and tie the tails in a bow. To remove pom for washing, untie the pom. If your pom has elastic loop, pull loop to the inside of hat and loop around the button. To see this technique done, check out this video by VeryPink Knits.
*You may sell what you make from this pattern, but please do not copy and reproduce the pattern. Do not use my photographs to sell your items. Please link back to my shop or website when selling your finished items online.*
Final Thoughts
I hope you love the XOXO Slouch Hat. This crochet beanie is one of my very first designs and will always hold a special place in my heart because of that. I’d love to see your versions of this crochet slouch hat, so be sure to use the hashtag #xoxoslouchhat and tag me on Instagram @craftingforweeks for a chance to be featured!
Until next time, Happy Crafting!


Gorgeous hat…thanks for sharing. I cannot wait to make one