The Ocean’s Breath Wall-Hanging: Crochet Pattern
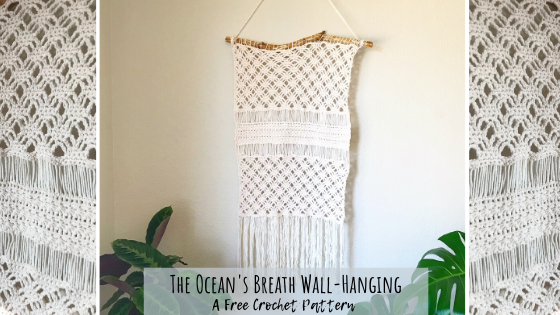
I’m so excited to share the Ocean’s Breath Wall-Hanging with you all today. I designed this crochet wall-hanging pattern last year, and it is easily one of my favorite home decor pieces. It’s looks so intricate, has beautiful texture, plus you can make it in any size that you want!

You can find the ad-free, PDF version of this crochet wall-hanging pattern in my Ravelry or Etsy shop!
Disclaimer: This post contains affiliate links. If you shop through one of these links, I will receive a small commission. This is a great way to get your supplies and also support my business.
About the Collection
This crochet wall-hanging is a part of the Ocean’s Breath Collection. I created this collection as a way to add the lovely (and trendy) look of macrame into crochet. I used some lacework and star stitches across the entire collection. And I added a little something extra with drop stitches on the wall-hanging.
The Yoga Bag
The yoga bag is where this collection all started. This beauty combines some crochet lace with some lovely star stitches to give a variety of texture. It also has some beautiful finishes, like an i-cord drawstring, a textured strap (with an option for back pack straps), and slide to keep everything in place. You can find this pattern in my Ravelry or Etsy shop.

The Key Fob
I also wanted to have a quick, simple piece that would be easy enough to add to a market, which is where the Ocean’s Breath Key Fob came in. These little keychains just take a few yards of yarn and a couple of minutes to make. Plus there’s two different styles to choose from. You can find the free pattern here! Or snag the PDF in my Ravelry or Etsy shop.

The Cardi
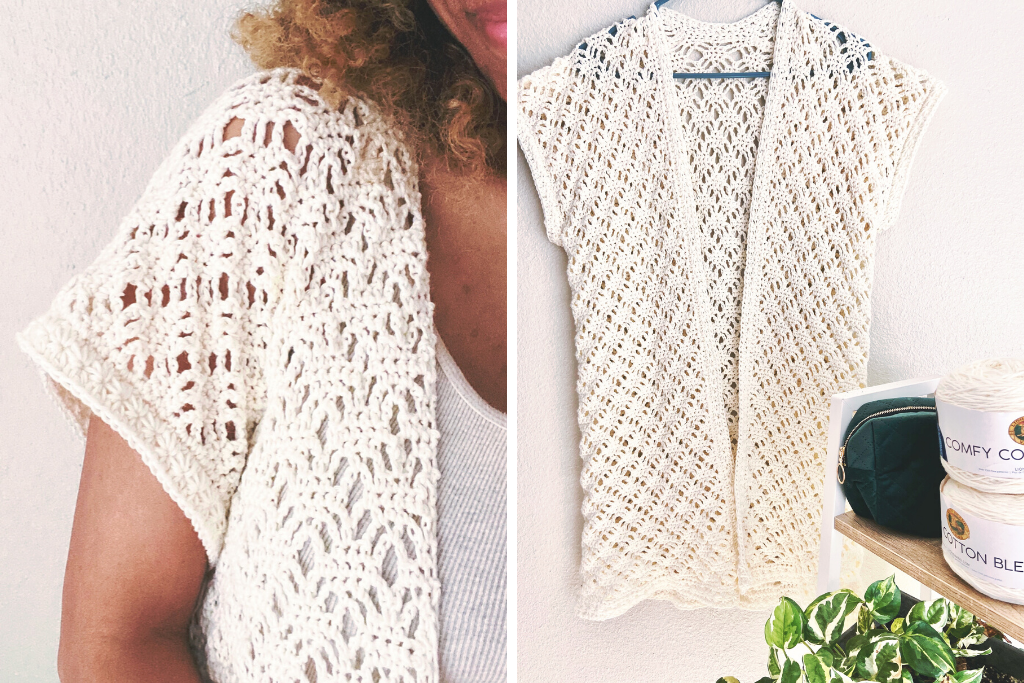
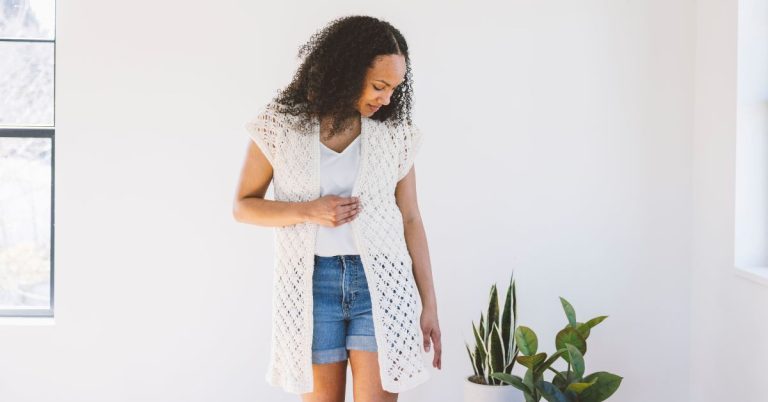
My upcoming piece the Ocean’s Breath Cardi will be featured on the Joy of Motion blog this summer. I’m so excited to add a wearable item to this collection and I can’t wait to share it with you all.

About the Stitches
There’s a few fancy stitches involved in this crochet wall-hanging, but I think even a beginner can get the hang of them with a little practice. The lacework probably looks the most intimidating, but when you break it down, its really just a combination of single crochet and chain stitches.
The Drop Stitch
I used the drop stitch in this pattern to mimic the way rope hangs between knots in macrame. This stitch takes a little practice to get it looking even every time. But once you get the hang of it, you’re going to want to use it in everything! You can check out my step-by-step tutorial here. Or check out this video below to help you get this hang of it.
The Star Stitch
The last fancy stitch is one of my favorites…the star stitch! I actually have a whole tutorial on this stitch here. But if you just need a quick visual refresher, check out the video below.
Pin it for Later!

Materials Needed
- 375 yds of worsted weight yarn
- Size K (6.5mm) crochet hook
- Tape Measure
- Tapestry needle
- Scissors
- Large Knitting needle, crochet hook or smooth dowel (for drop stitches)
- Stick or Dowel to hang
Stitches Used
Ch – Chain
SC – Single Crochet
DC – Double Crochet
Drop St – Drop Stitch
HDC – Half Double Crochet
Star Stitch
Skill Level:
Intermediate
Finished Measurements: (without fringe)
24” tall
17” wide
Gauge
The gauge width is not essential to this pattern. However, to meet the measurements of the crochet wall-hanging listed, use following swatch. Ch 18, sc in 2nd chain from hook and each ch across. Follow LACE SECTION directions. The swatch should measure 4 1/2” wide and 3” tall.

Notes
- Chains at the beginning of the rows do not count as a stitch throughout this pattern.
- Pattern is written in increments of 8 stitches. If you opt to customize the size of your crochet wall-hanging, increase or decrease the starting chain by 8 stitches.
- Some shorthand elements are used in this pattern. 2 Hdc means to work two Half double crochet stitches in the next stitch, while Hdc 2 means to work one Half double crochet stitch in each of the next two stitches.
- When working the LACE SECTION, you will be skipping stitches and using chains to create the open pattern. Only single crochet stitches are counted.
Pattern
LACE SECTION 1
With K Hook.
Row 1: Ch 74. Sc in 2nd ch from hook. Sc in each ch st across. (73)
Row 2: Ch 1. Sc 3. *Ch 5, Sk 3 st, Sc 5.* Repeat from * until 6 sc st remain. Ch 5, Sk 3 st, Sc 3.
Row 3: Ch 1 and turn. Sc 2. *Ch 3, Sk 1 st, Sc 1 in the Ch 5 space, Ch 3, Sk 1 st, Sc 3.* Repeat from * until 3 sc st remain. Sk 1 st, Sc 1 in each of the last 2 stitches.
Row 4: Ch 1 and turn. *Sc 1. Ch 3, Sk 1 st, Sc 1 in the Ch 3 space, Sc 1, Sc 1 in the Ch 3 space, Ch 3, Sk 1 st.* Repeat from * around until 2 sc st remain. Sk 1 st, Sc 1 in the last stitch.
Row 5: Ch 5 and turn. *Sc 1 in the Ch 3 space, Sc 3, Sc 1 in the Ch 3 space, Ch 5, Sk 1 st* Repeat from * until 4 sc st remain. Ch 5. Sc 1 in the Ch 3 space, Sc 3, Sc 1 in the Ch 3 space. Ch 2. Dc in the last st.
Row 6: Ch 1 and turn. Sc 1 in the Dc from previous row. *Ch 3, Sk 1 st, Sc 3, Sk 1 st, Ch 3, Sc 1 in Ch 5 space.* Repeat from * until 5 sc st remain. Ch 3, Sk 1 st, Sc 3, Ch 3. Sk 1 st. Sc in the 3rd ch of the ch 5 from the previous row.
Row 7: Ch 1 and turn. Sc 1, Sc 1 in Ch 3 space. *Ch 3, Sk 1 st, Sc 1, Ch 3, Sk 1 st, Sc 1 in the Ch 3 space, Sc 1, Sc 1 in the Ch 3 space.* Repeat from * until 4 sc st remain. Ch 3, Sk 1 st, Sc 1, Ch 3, Sk 1 st, Sc 1 in the Ch 3 space, Sc 1.
Row 8: Ch 1 and turn. Sc 2, Sc 1 in the Ch 3 space. *Ch 5, Sk 1 st, Sc 1 in the Ch 3 space, Sc 3, Sc 1 in the Ch 3 space.* Repeat from * until 3 sc st remain. Ch 5, Sk 1 st, Sc 1 in the Ch 3 space, Sc 2.
Row 9-26: Repeat Rows 3-8 three times.
DROP STITCH SECTION
Row 1: Ch 1. Sc 3, *Sc 3 in the Ch 5 space, Sc 5* Repeat from * until 3 sc st remain. Sc 1 in each of the last 3 stitches. (73)
Row 2: Complete a row of drop stitches doing the following.
Ch 1. *Pull your chain 1 until the loop is large enough to place onto your needle. Place the loop from the ch 1 onto your needle (the first ch 1 counts as first st). Insert your hook into the next stitch, pull up a loop. Ch 1.*. Repeat from * to * until you reach the end of the row.
Row 3: Slide all the drop stitches off your needle and turn. Insert hook into first drop stitch space and pull up a loop. Ch 1. Sc in first drop stitch and each drop stitch across. (73)
STAR STITCH SECTION
Row 1: Complete a row of star stitches doing the following.
Ch 3. Insert hook in 2nd ch from hook, pull up a loop. Then insert hook into next ch, pull up a loop. Insert hook and pull up a loop over next 3 sc st. (6 loops on hook) Yarn over and pull through all loops on hook. Ch 1 to close star stitch (eye of star stitch).
Insert hook into eye of star stitch, pull up a loop. Then insert hook between the last two spikes of the previous star stitch, pull up a loop. Insert hook in the same stitch as the last spike of the previous star stitch, pull up a loop. Insert hook and pull up a loop over next 2 sc stitches. (6 loops on hook) Yarn over and pull through all loops on hook. Ch 1 to close star stitch.
Repeat across until you finish the last star stitch. Hdc in same stitch as last star.
Row 2: Ch 1 and turn. 2Hdc in the eye of each star stitch across. Hdc in top of last star stitch. (73)
Row 3-6: Repeat Rounds 2-3
Row 7: Ch 1 and turn. Sc in each stitch across.
Repeat Rows 2-3 of DROP STITCH SECTION
LACE SECTION 2
Row 1: Ch 1 and turn. Sc in each ch st across. (73)
Row 2: Ch 1. Sc 3. *Ch 5, Sk 3 st, Sc 5.* Repeat from * until 6 sc st remain. Ch 5, Sk 3 st, Sc 3.
Row 3: Ch 1 and turn. Sc 2. *Ch 3, Sk 1 st, Sc 1 in the Ch 5 space, Ch 3, Sk 1 st, Sc 3.* Repeat from * until 3 sc st remain. Sk 1 st, Sc 1 in each of the last 2 stitches.
Row 4: Ch 1 and turn. *Sc 1. Ch 3, Sk 1 st, Sc 1 in the Ch 3 space, Sc 1, Sc 1 in the Ch 3 space, Ch 3, Sk 1 st.* Repeat from * around until 2 sc st remain. Sk 1 st, Sc 1 in the last stitch.
Row 5: Ch 5 and turn. *Sc 1 in the Ch 3 space, Sc 3, Sc 1 in the Ch 3 space, Ch 5, Sk 1 st* Repeat from * until 4 sc st remain. Ch 5. Sc 1 in the Ch 3 space, Sc 3, Sc 1 in the Ch 3 space. Ch 2. Dc in the last st.
Row 6: Ch 1 and turn. Sc 1 in the Dc from previous row. *Ch 3, Sk 1 st, Sc 3, Sk 1 st, Ch 3, Sc 1 in Ch 5 space.* Repeat from * until 5 sc st remain. Ch 3, Sk 1 st, Sc 3, Ch 3. Sk 1 st. Sc in the 3rd ch of the ch 5 from the previous row.
Row 7: Ch 1 and turn. Sc 1, Sc 1 in Ch 3 space. *Ch 3, Sk 1 st, Sc 1, Ch 3, Sk 1 st, Sc 1 in the Ch 3 space, Sc 1, Sc 1 in the Ch 3 space.* Repeat from * until 4 sc st remain. Ch 3, Sk 1 st, Sc 1, Ch 3, Sk 1 st, Sc 1 in the Ch 3 space, Sc 1.
Row 8: Ch 1 and turn. Sc 2, Sc 1 in the Ch 3 space. *Ch 5, Sk 1 st, Sc 1 in the Ch 3 space, Sc 3, Sc 1 in the Ch 3 space.* Repeat from * until 3 sc st remain. Ch 5, Sk 1 st, Sc 1 in the Ch 3 space, Sc 2.
Row 9-26: Repeat Rows 3-8 three times.
Row 27: Ch 1. Sc 3, *Sc 3 in the Ch 5 space, Sc 5* Repeat from * until 3 sc st remain. Sc 1 in each of the last 3 stitches. (73)
Tie off and leave a long tail for sewing piece to stick or dowel.
FINISHING
To Attach Fringe:
- Cut 73 strands of yarn approximately 24” long each.
- Fold each strand in half. Insert hook into the first stitch and pull up the center of the strand.
- Using the hook, pull the two ends of the strand from the back and through the loop you just pulled up. Tighten the loop to secure the fringe.
- Repeat in each stitch across

Cosmetic Finishes:
- Block your crochet wall-hanging to ensure straight edges.
- I also recommend lightly steaming the fringe to make it smoother. This can be done after hanging.
Hanging your Piece:
- Using the long tail, whip stitch around the stick or dowel you are going to hang your piece from. Whip stitch in first two stitches, then in every other stitch across, and finally in the last two stitches.
- Make a chain of stitches approximately 24” long (Note: The chain may need to be longer based on the stick or dowel you attach your work to). Tie one end of the chain to each end of the stick.
- Hang from the chain.

Final Thoughts
This crochet wall-hanging pattern could easily be a stash busting project with some color changes in each section. It could also be really stunning with some bright or bold colors. I’m really excited to see what everyone works up.
This is one of my very favorite patterns, so I hope you all love it as much as I do. I’d love to see some of your finished crochet wall-hanging pieces, so be sure to use the hashtag #oceansbreathwallhanging on Instagram and tag @craftingforweeks. Until next, time Happy Crafting!
Kelsie


