How to Crochet with Beads (without pre-stringing)
Today I’m going to share a really cool crochet technique with you that I have incorporated into a few of my patterns. I’m going to show you how to crochet with beads! That’s right…you’re going to learn how to add beads to your crochet-work, without pre-stringing them!
I love how versatile this technique can be. While adding beads to crochet is not a new concept, this method removes the need to string them all before you start your project! So this way you can crochet with beads without knowing exactly how many you’ll need and without the adding time of pre-stringing. Lets get started!

Inspiration to Learn
I first saw a similar technique done by a knit designer that I follow on Instagram, Knitdiaries. She was adding bead to her knit tank top, and I thought “Hey, I bet you could do something similar with crochet!”. So I bought a tub of beads to experiment with.
I was pretty excited with how well this technique worked with crochet. After a little trial and error with some beads, hook sizes and yarn weights, I came up with a simple project to incorporate the technique. So if you’re wanting to practice, or you just love fancy ear warmers, check out the Bauble Headband! And if you’re in the mood for a beanie, scarf, fancy fingerless mitts or even a Christmas stocking, check out the XOXO Collection!


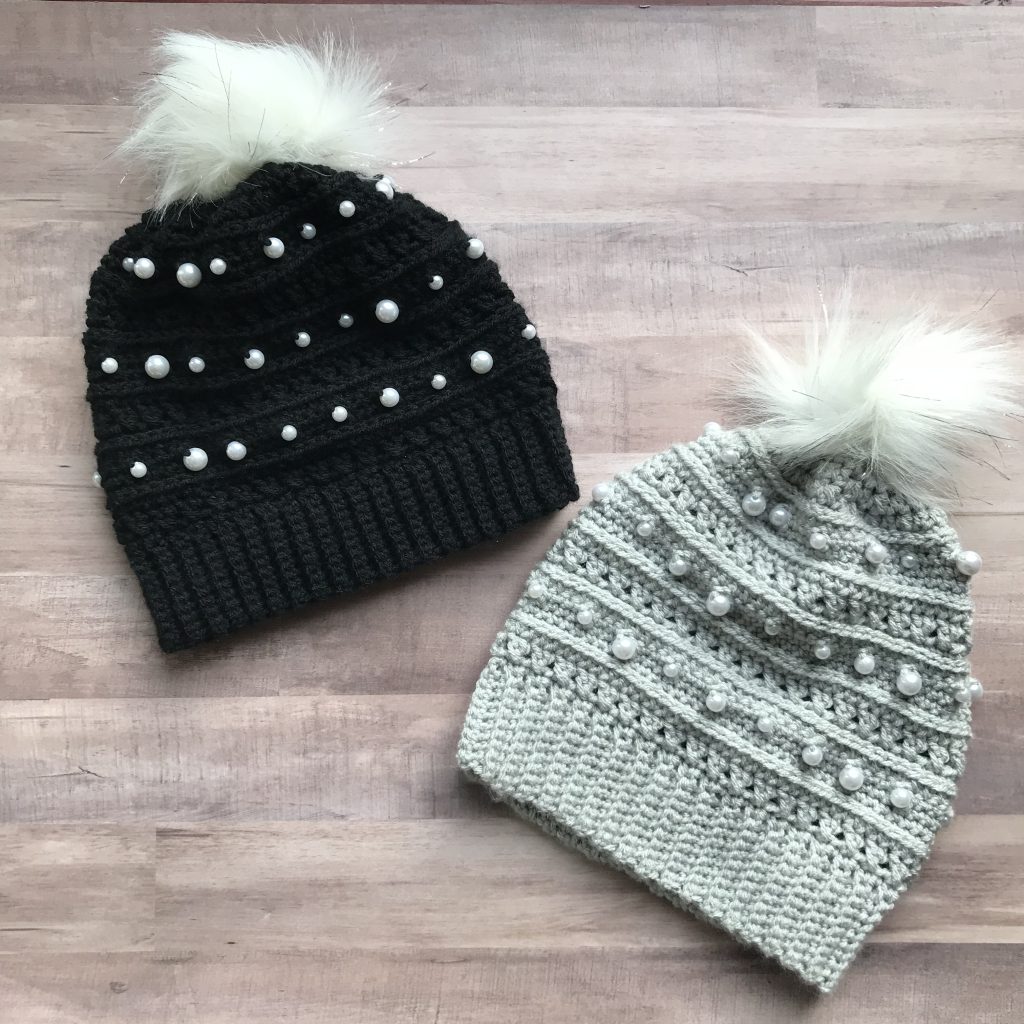
About the Technique
Ok, so let’s talk about crocheting with beads! Like I mentioned above, adding beads in crochet-work usually requires you to string your beads ahead of time. That means you need to know exactly how many beads and what order you want them in before you start. You would traditionally string them on first, then begin your project, sliding a bead up your yarn or thread when you need it.
With this technique that I’m going to show you, you can just add beads as you go. The main difference between the two is that instead of the beads being in the stitches themselves, they will actually be next to the stitches. In my opinion, the difference in appearance is barely noticeable.
I do find that this technique works best when the beads are added onto the right side (the front) of the work and a row of stitches are worked over them on the wrong side (the back). This pushes the beads forward, somewhat similar to adding a bobble stitch to your work. You can definitely accomplish it without working back and forth in rows, but that’s just my favorite way to do it.
Also while you can do this with any stitch, I find that a half double crochet or smaller helps keep the beads at the front of the work. Since you are crocheting the beads next to your stitches instead of inside of your stitches, then tend to move around with larger stitches. I’ll show you what I mean in my video below.
What you’ll Need
So you won’t need a lot of extras to learn to crochet with beads. You will need some beads though. The main factor when choosing your beads is the weight of yarn you’re using. The smaller the yarn weight, the smaller the bead you can potentially use. The reason for this is that you will need to be able to pull two strands of your yarn of choice through your bead.
For example, I typically use worsted weight yarn in my bead designs, and the colorful bauble style beads I have pictured are Bead Design Co beads from Hobby Lobby. I’ve also had good success with assorted wooden beads from whatever craft store I happen upon. If I were using fingering weight yarn, I could use a much smaller bead.
You’ll also need a small crochet hook. The hook needs to be small enough to fit through the hole on your bead. So the smaller the bead you choose, the small hook you will need.
Let’s Crochet with Beads!
Ok, so let’s learn how to add a bead! I’ll walk you through this technique step-by-step description. Then you can find the corresponding photos below.
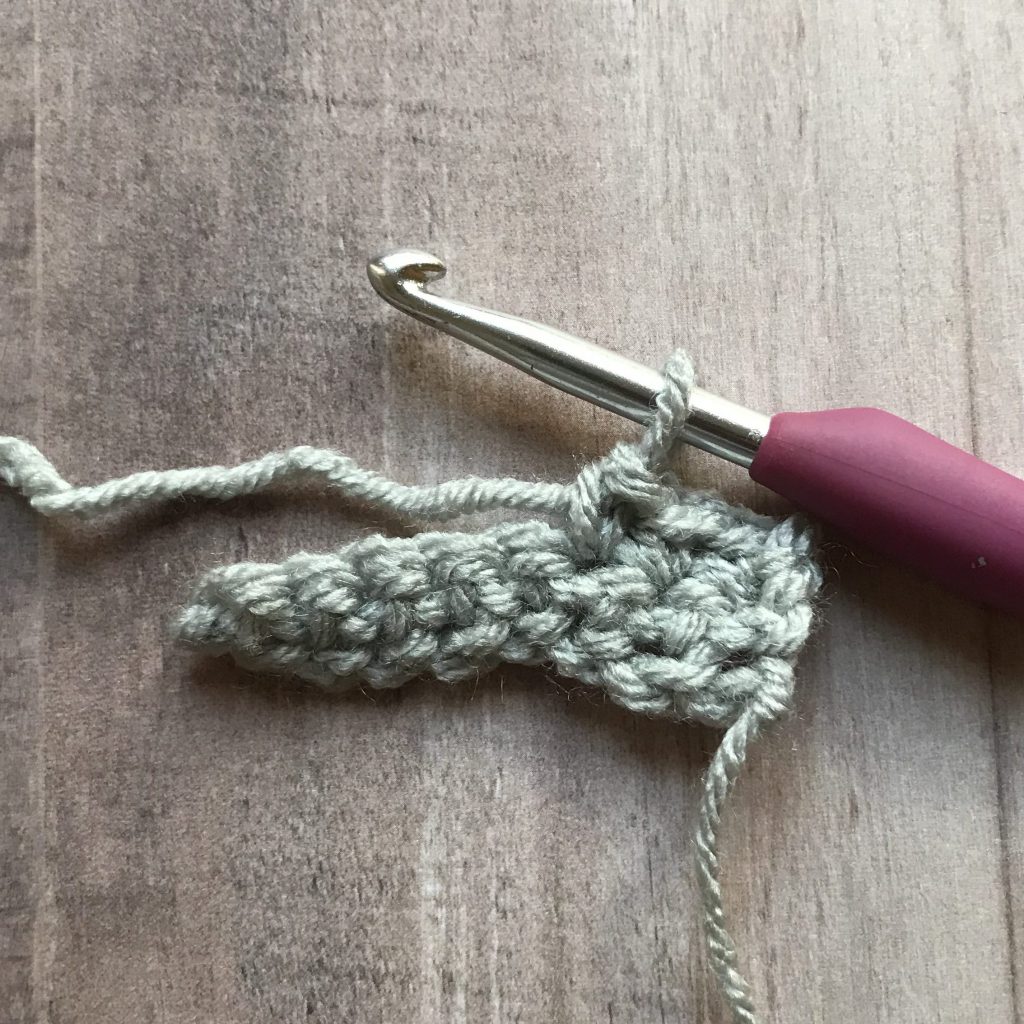
- Pull up a loop: First pull up the working loop on hook a little higher than usual.
- Remove hook: Then, take your hook out of your work, making sure to leave that working loop pulled up.
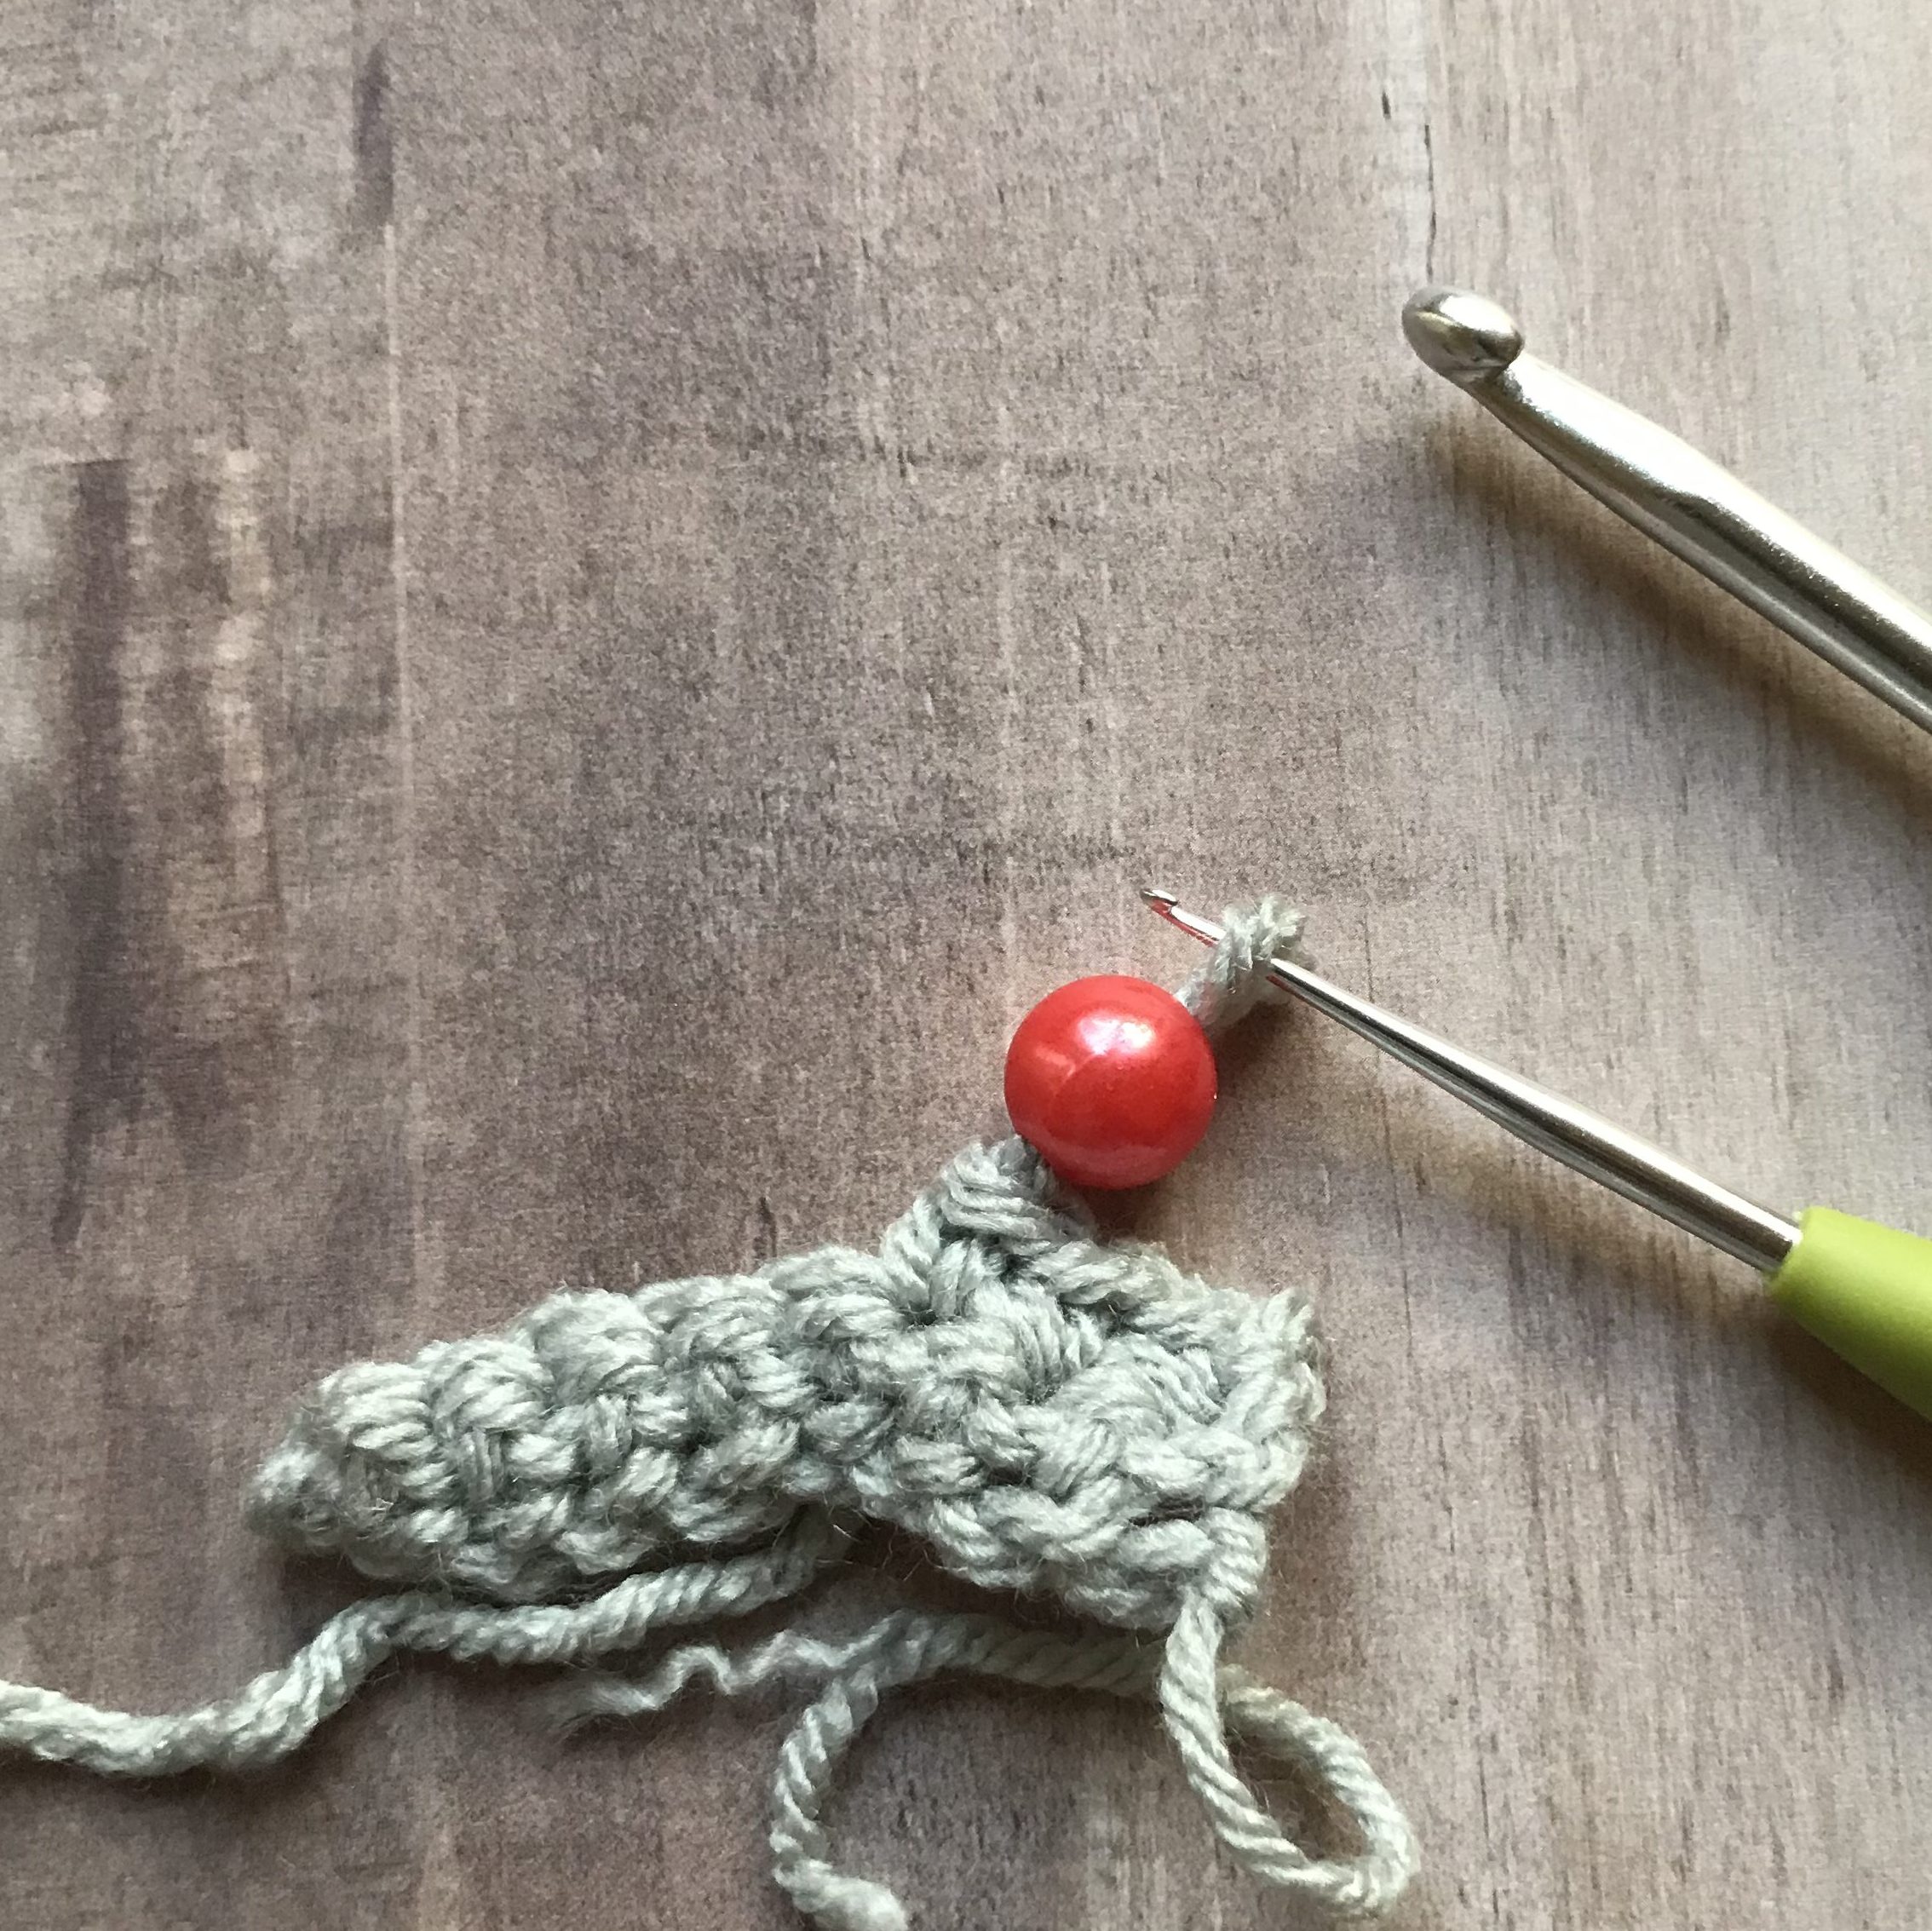
- Put Bead on Smaller Hook: Next, you’ll put your bead onto a small crochet hook, I used a 1.50mm hook. The trick is really to just find a hook that will fit through whatever bead size you’re using.
- Pull Loop through Bead: Using the small hook, you’ll pull the working loop of yarn through the bead on the hook. Keep in mind that the smaller the bead you choose, the lighter weight yarn you’ll need to ensure it can pass through the bead.
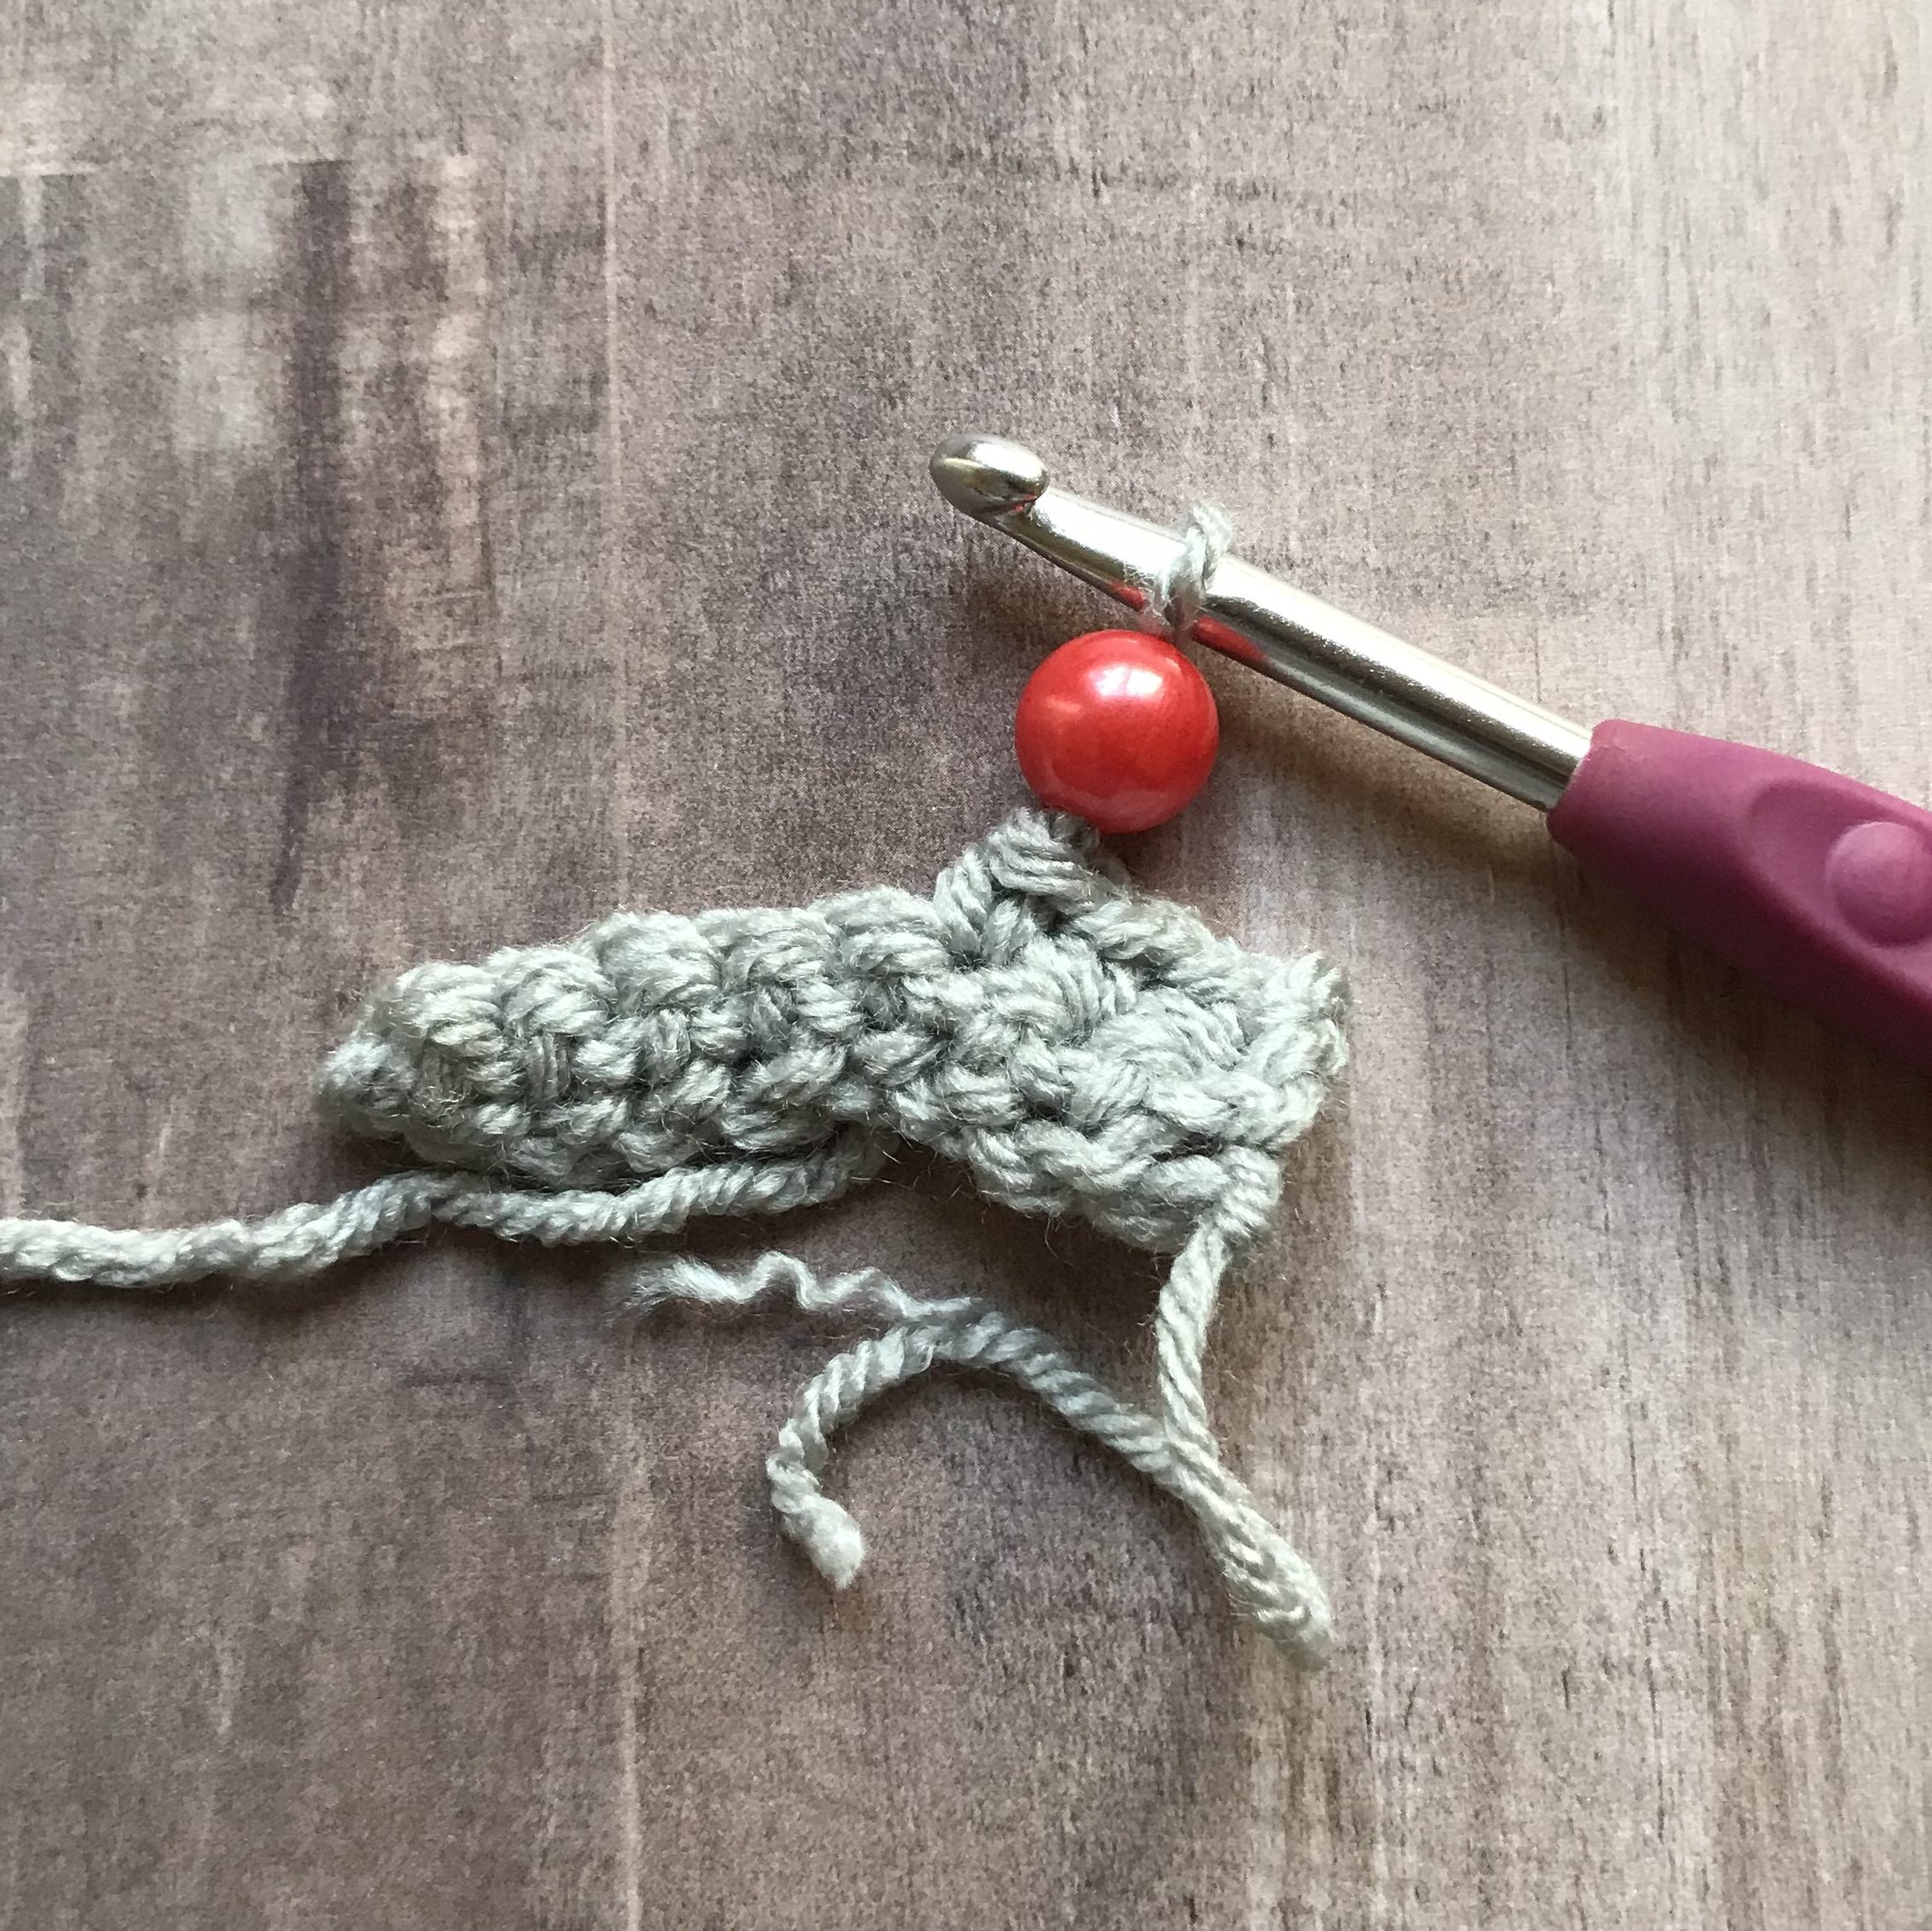
- Reinsert original hook: Finally, you’ll reinsert your hook where you removed it with the added bead below it and continue crocheting according to the pattern.
- Continue working: When you work the next row of stitches, you will simply push the bead to the front of the work making sure the stitch gets worked behind the bead.



Video Tutorial
Sometimes, if easier to watch a technique being done. If you’d rather watch a video on how to crochet with beads, you can check that out below!
Final Thoughts
So now that you’ve seen this technique, how would you incorporate it into your own crochet? I’d love to see how you’re doing it! Be sure to tag me on Instagram @craftingforweeks so I can see your work!
And if you’d like a project to practice with, check out any of these free patterns on my blog that incorporate adding beads to crochet!
- Make a simple ribbed ear warmer that has a whole lot of flair with The Bauble Headband!
- Check out this popular textured slouchy beanie pattern and substitute your bobble stitches for beads with The XOXO Slouch Hat!
- Make a fun textured ear warmer to coordinate with your XOXO Collection pieces with The XOXO Ear Warmer!
- Check out this textured cowl scarf that’s full of visual interest and a perfect partner to the slouch hat or ear warmer with The XOXO Cowl!
- Make a quick and easy cup cozy with The XOXO Coffee Cup Cozy!
Until next time, Happy Crafting!
