How to Crochet a Sailor’s Knot Headband
Today, I’m going to show you how to crochet a sailor’s knot headband! I absolutely love how cute and simple this ear warmer pattern is. And bonus…it works up in about an hour! The Crossed Pair has been one of my most popular patterns since it’s release in 2018. The original design was just for adult size, but since then has been updated for 10 different sizes ranges from Newborn to Adult Large.

**If you would like to purchase the ad-free, printable PDF, check it out here in my Ravelry or Etsy shop. If you have previously purchased this pattern, check for the update on Ravelry or message me on Etsy with your email address and I’ll send you the updated PDF.**
**
About the Headband
This fun headband features the sailor’s knot. It’s made in two pieces and then seamed together after the knot is done. When I originally designed this, I asked my husband to help me think of a name. He said the knot reminded him of an electrical diagram that he was studying at the time called a crossed pair. And so I went with that.
This is worked up using bulky (5) yarn. The original design used Lion Brand Woolspun, but they discontinued that line shortly after. However, Lion Brand Color Made Easy or Hue + Me are perfect substitutes. I also had some fun playing with Brava Bulky (pictured below in colorway Brindle) from WeCrochet and using a worsted weight yarn held double. Basically if it meets the gauge, you’re good to go.

About the Sizing
My original Crossed Pair Headband only came in one size. I had a several requests about adjusting it for a smaller head and even a request for a newborn pattern. So what you see here is the new and improved Crossed Pair pattern.
I was worried when I started making baby sizes that the size of the sailors knot would just be absurd on a baby’s head but actually it’s pretty adorable. Once I got to working on it, and easy adjustment in the number of rows made the knot a better size for a tiny head. So now its available in Newborn – Adult Large. But wait…there’s more!
Originally I made this sailor’s knot headband in adult size with just a single width. But as I was reworking the pattern, I experimented with some different headband widths. And they turned out amazing. So now you can make it in the original wide, wide, or extra wide! (I’m a little partial to the extra wide myself)

About the Knot
The sailor’s knot headband is really simple once you get the hang of the knot. But it can be a little tricky at first. I have a photo tutorial walking you through tying it in the pattern, but I also recorded a video when I originally wrote the pattern that will still help you out.
Love it?! Pin It for Later!

Let’s Get Started…
Materials Needed:
30-100 yds of Color Made Easy (or similar 5 Bulky weight yarn)
Size K (6.5mm) crochet hook
Measuring Tape
Tapestry needle
Scissors
Stitches Used:
Sl St – Slip Stitch
Ch – Chain
Hdc – Half Double Crochet
Optional: Foundation Hdc – Foundation Half Double Crochet
Whip Stitch
Gauge:
11 HDC, 6 rows = 4” square
Notes:
- Chain 2 does not count as a stitch throughout this pattern.
- Stitch counts for each row are enclosed in [] brackets.
- Sizes are written as follows: (Newborn, 0-3 Months, 3-6 Months, 6-9 Months, 9-12 Months, Toddler, Child, Teen, Adult, Adult Large).
- Headband is available in 4 widths.
- Newborn – 18 Months = 2.75”
- Toddler – Adult = 3.25”
- Wide = 4.25”
- Extra Wide = 5.25”
PATTERN
Row 1: Ch (53,56,59,62,65,68,71,74,80,86). Hdc in 3rd loop from hook. Hdc in each chain across. [51,54,57,60,63,66,69,72,78,84]
{Note: Alternatively Foundation Hdc (51,54,57,60,63,66,69,72,78,84)}
For Newborn – 18 Months skip to Row 3.
Row 2: Ch 2 and turn. Hdc in first stitch and each stitch across. [-,-,-,-,-,66,69,72,78,84]
Row 3: Ch 2 and turn. Hdc in first (11,12,13,14,15,16,17,18,20,22) stitches. Sl st in next (29,30,31,32,33,34,35,36,38,40) stitches. Hdc in last (11,12,13,14,15,16,17,18,20,22) stitches. [51,54,57,60,63,66,69,72,78,84]
For Wide version (4.25”) repeat Row 3.
For Extra Wide version (5.25”) repeat Row 3 twice.
Tie off and leave long tail.
Make 2.
ASSEMBLY
Sailor’s Knot:
With right sides of stitches facing up on both pieces, tie sailor’s knot. Make sure that end portions with extra Hdc stitches face inward after knot is tied.

Finishing:
- Line up the two ends to the right of the knot with right side facing up. Hold the two pieces together with right sides facing.
- With tail long tail, slip stitch in the front loop of the bottom piece and the back loop of the upper piece. Continue to slip stitch in this way for (10,11,12,13,14,15,16,18,21) more stitches. Do not tie off yet.
- With tapestry needle, take the tail and pull through the edge of the sailor’s knot, securing the edge of the knot in place. Tie off in back of headband and weave in end.
- Repeat on the opposite side of knot.
- Fold the headband in half so that the short ends meet. With right sides facing in, whip stitch the ends of the headband closed. Tie off and weave in ends.


Final Thoughts
I know you all already love this one, so I hope that you can continue to enjoy it in all 10 sizes! I’d love to see some of your work too. Be sure to tag me on Instagram @craftingforweeks and use the hashtag #crossedpairheadband for a chance to be featured.
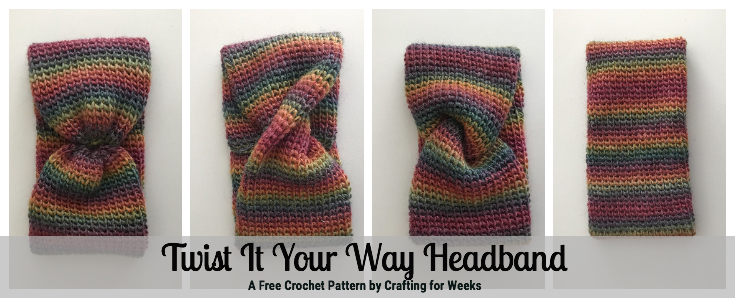
And if you’re loving making headbands and earwarmers, check out some of these other free patterns below! Or click here to see all my headband patterns!


Until next time, Happy Crafting!


