How to Crochet a Sunset Beach Blanket
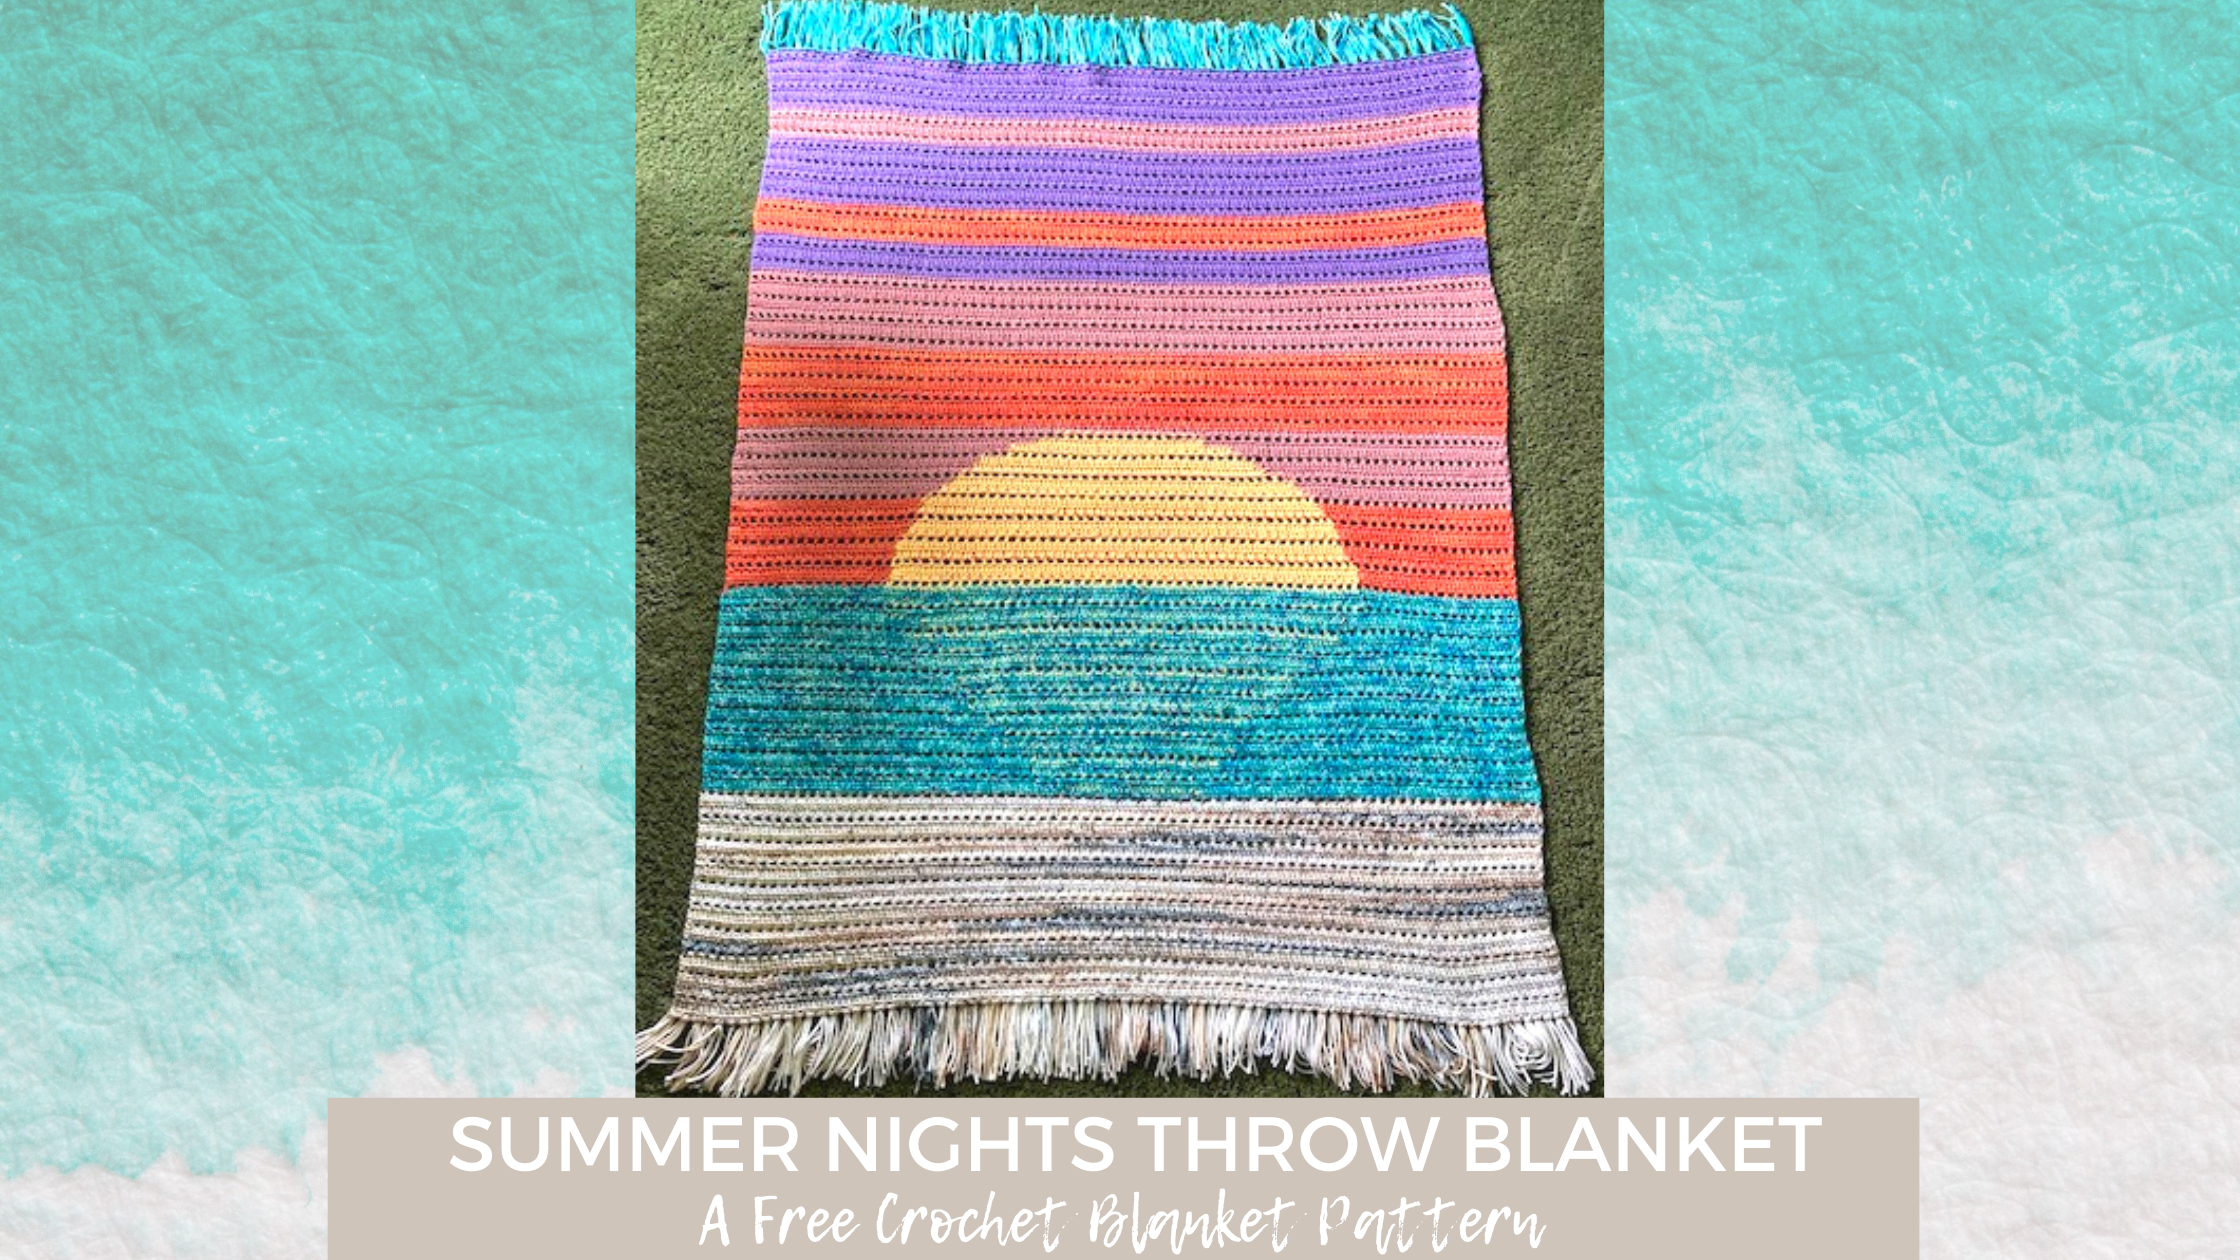
Many of you may be familiar with my Summer Nights Ruana that released earlier this year. This colorful sunset wrap was a top seller for me this summer. But what you might now know is that when I designed it, I wanted to modify the design for those that aren’t really interested in garments. So today I bring you the Summer Nights Throw Blanket.
The following is a free pattern, if you would like to purchase a detailed, ad-free PDF version of this pattern, please visit my Etsy or Ravelry shop.

**This site contains affiliate links to products. I may receive a commission for purchases made through these links. I will only link products I personally recommend.**
About Summer Nights
The first piece of this set was the Summer Nights Ruana. I designed the ruana as a guest blog post for E’Claire Makery. Claire work tends to specialize in interested color work, so I thought this would be a great fit for her blog.
The idea behind both the ruana and the blanket was the concept of painting with yarn. I wanted to create a beautiful beach scene complete with gradient color changes and blended colors. I accomplished through a combination of tapestry-style crochet and coordinating yarn colors. And ultimately, I think the finished result was really stunning.

I didn’t stop there though. With the ruana being essentially a modified blanket to begin with, I made some adjustments and created the Summer Nights throw blanket pattern with the same techniques.
About the Blanket
The Summer Nights Throw is designed with a combination of half double crochet stitches with a bit of tapestry worked in. In my opinion, it’s the perfect combination of challenging and mindless crochet. Perfect project for a nice Netflix series binge.
The finished blanket will measure approximately 48 x 60. Obviously gauge can effect the finished blanket size and blocking can give you a couple extra inches. While gauge is not completely essential to this project just bear in mind that your blanket size may vary slightly due to this.
If you’re trying to make a larger blanket, you can add stitches to the foundation in increments of 4 stitches. When you get to the tapestry portion, just remember to add 2 stitches to each end so that the sun stays center. You can also include additional rows to each color section of the blanket for a longer throw.
About the Yarn
For my ruana, I used Lion Brand Ice Cream Cotton Blend. I honestly think this was the perfect yarn choice for the project. Not only is the yarn a dream to work with, but the colors blended together almost seamlessly.

Since, Ice Cream Cotton Blend is a weight 4 yarn, you can pretty much substitute any worsted weight yarn for the Summer Nights throw blanket. My sample blanket (completed by @jessmaejess) used I Love this Cotton from Hobby Lobby. I had other testers use acrylic worsted as well with great results.
UPDATE: The Ice Cream Cotton Blend yarn has since been discontinued by Lion Brand. Sad face. But don’t worry, you can sub it out! To get a nice color blend, try a series of ombre or gradient yarns together. Some ideas for this are Red Heart Ombre, WeCrochet Comfy Color Mist, or even Lion Brand Shawl in a Ball. If you come across some more fab yarn subs, let me know and I’ll share them!
Special Techniques
Just like the ruana, the Summer Nights Throw Blanket is made with a combination of half double crochet stitches. It is written in a three-row repeat of HDC row, HDC row, HDC Mesh (hdc, ch 1, sk 1 st) row.
You will be using one special stitch in the blanket to create the reflection of the sunset on the water. I call this stitch the Half Double Crochet Fade Stitch. This is a stitch I concocted so that you would be able to use two color strands without creating a bulkier stitch. I have a whole step-by-step tutorial on this stitch and you can find it right here! Or check out the video in the pattern below!
Bonus Graph
This pattern has an optional graph. If you choose to work from the graph, you can download the free graph as a bonus for subscribing to my newsletter. For access, simply subscribe below.
If you’re new to reading a graph, check out this video.
Love it? Pin it for Later!

Materials Needed
- 11 Skeins of Lion Brand Ice Cream Cotton Blend (or similar Worsted Weight yarn)
- Chocolate – 2 Skeins (450 yds)
- Blueberry – 2 Skeins (450 yds)
- Orange – 2 Skeins (450 yds)
- Strawberry – 2 Skeins(450 yds)
- Grape – 2 Skeins (450 yds)
- Lemon – 1 Skein (200 yds)
- Size J (6.0mm) crochet hook
- Tapestry needle
- Scissors
- Measuring Tape
Stitches Used
HDC – Half Double Crochet
Ch – Chain
HDC Mesh – Half Double Crochet Mesh
HDC Fade – Half Double Crochet Fade
Skill Level
Intermediate
Gauge
(With J hook) *HDC row, HDC row, HDC Mesh row.* Repeat from * to * until swatch reaches appropriated size. 12 stitches x 10 rows = 4” square
Notes
- Chains at the beginning of the rows do not count as stitches throughout this pattern.
- There is a graph as well as written instructions to complete the color changes on this blanket. To download the free graph, subscribe to my newsletter above for access.
- The Summer Nights Throw graph includes two versions. You can print the split page version and tape the edges together for a hard copy. Or you can work from the full version by zooming in on the graph from a table or smartphone.
- This pattern repeats the same 3-row combination throughout the blanket. This pattern is continued through color changes as well.
- If adjusting the width of your blanket, you will need to increase your foundation ch in increments of 4 stitches. When doing color work portions, add 2 stitches to each end to ensure that the sunset stays in the center.
- If adjust the length of your blanket, you can do extra repeats of any color throughout the blanket.
Pattern
SAND
Row 1: With Color A (Chocolate), Ch 162. Hdc in 2nd ch from hook and each ch across. (161)
Row 2: Ch 1 and turn. Hdc in each stitch across. (161)
Row 3: Ch 1 and turn. *Hdc 1, ch 1, sk 1 st.* (HDC Mesh) Repeat from * to * until you reach the last stitch. Hdc in last stitch. (81 Hdc, 80 ch sp)
Row 4: Ch 1 and turn. Hdc in top of last hdc from previous row. *Hdc in ch sp, hdc in top of hdc from previous row.* Repeat from * to * across ending with hdc in last stitch.
Row 5 – 30: Repeat Rows 2-4 nine more times ending on a Row 3 (HDC Mesh) repeat.
WATER
NOTES: You will be using the HDC fade technique in this section according to light blue squares on the chart. See Special Stitches for help with this stitch. When you complete the last square of HDC fade in a row, leave the accent color there to be picked up in the following row and finish the row with the main color. If the next row starts HDC fade several stitches over, stretch the yarn to the new stitch, then work over the visible accent yarn. In rows that there are chains between the hdc stitches, you will complete a chain stitch with both colors.
Row 31-60: Switch to Color B (Blueberry) and Color C (Lemon). Repeat Rows 2-4 following color changes on chart and ending on a Row 3 (HDC Mesh) repeat.
Written Instructions
← Row 31 [RS]: (Blue ) x 67, (HDC Fade [Blue/Yellow]) x 27, (Blue ) x 67
→ Row 32 [WS]: (Blue ) x 67, (HDC Fade [Blue/Yellow]) x 27, (Blue ) x 67
← Row 33 [RS]: (Blue ) x 67, (HDC Fade [Blue/Yellow]) x 27, (Blue ) x 67
→ Row 34 [WS]: (Blue ) x 63, (HDC Fade [Blue/Yellow]) x 35, (Blue ) x 63
← Row 35 [RS]: (Blue ) x 63, (HDC Fade [Blue/Yellow]) x 35, (Blue ) x 63
→ Row 36 [WS]: (Blue ) x 63, (HDC Fade [Blue/Yellow]) x 35, (Blue ) x 63
← Row 37 [RS]: (Blue ) x 59, (HDC Fade [Blue/Yellow]) x 43, (Blue ) x 59
→ Row 38 [WS]: (Blue ) x 59, (HDC Fade [Blue/Yellow]) x 43, (Blue ) x 59
← Row 39 [RS]: (Blue ) x 59, (HDC Fade [Blue/Yellow]) x 43, (Blue ) x 59
→ Row 40 [WS]: (Blue ) x 55, (HDC Fade [Blue/Yellow]) x 51, (Blue ) x 55
← Row 41 [RS]: (Blue ) x 55, (HDC Fade [Blue/Yellow]) x 51, (Blue ) x 55
→ Row 42 [WS]: (Blue ) x 55, (HDC Fade [Blue/Yellow]) x 51, (Blue ) x 55
← Row 43 [RS]: (Blue ) x 51, (HDC Fade [Blue/Yellow]) x 59, (Blue ) x 51
→ Row 44 [WS]: (Blue ) x 51, (HDC Fade [Blue/Yellow]) x 59, (Blue ) x 51
← Row 45 [RS]: (Blue ) x 51, (HDC Fade [Blue/Yellow]) x 59, (Blue ) x 51
→ Row 46 [WS]: (Blue ) x 47, (HDC Fade [Blue/Yellow]) x 67, (Blue ) x 47
← Row 47 [RS]: (Blue ) x 47, (HDC Fade [Blue/Yellow]) x 67, (Blue ) x 47
→ Row 48 [WS]: (Blue ) x 47, (HDC Fade [Blue/Yellow]) x 67, (Blue ) x 47
← Row 49 [RS]: (Blue ) x 43, (HDC Fade [Blue/Yellow]) x 75, (Blue ) x 43
→ Row 50 [WS]: (Blue ) x 43, (HDC Fade [Blue/Yellow]) x 75, (Blue ) x 43
← Row 51 [RS]: (Blue ) x 43, (HDC Fade [Blue/Yellow]) x 75, (Blue ) x 43
→ Row 52 [WS]: (Blue ) x 39, (HDC Fade [Blue/Yellow]) x 83, (Blue ) x 39
← Row 53 [RS]: (Blue ) x 39, (HDC Fade [Blue/Yellow]) x 83, (Blue ) x 39
→ Row 54 [WS]: (Blue ) x 39, (HDC Fade [Blue/Yellow]) x 83, (Blue ) x 39
← Row 55 [RS]: (Blue ) x 39, (HDC Fade [Blue/Yellow]) x 83, (Blue ) x 39
→ Row 56 [WS]: (Blue ) x 34, (HDC Fade [Blue/Yellow]) x 93, (Blue ) x 34
← Row 57 [RS]: (Blue ) x 34, (HDC Fade [Blue/Yellow]) x 93, (Blue ) x 34
→ Row 58 [WS]: (Blue ) x 34, (HDC Fade [Blue/Yellow]) x 93, (Blue ) x 34
← Row 59 [RS]: (Blue ) x 34, (HDC Fade [Blue/Yellow]) x 93, (Blue ) x 34
→ Row 60 [WS]: (Blue ) x 34, (HDC Fade [Blue/Yellow]) x 93, (Blue ) x 34
SUN
NOTES: In this section, you will be carrying the “sky” color as you complete the “sun” stitches. You will work the sun stitches around the unused sky color. When you complete the last square of sun in a row, leave the accent color there to be picked up in the following row and finish the row with the sky color. Work over the sun yarn, when decreases are more than one stitch. In rows that there are chains between the hdc stitches, you will complete a chain stitch with both colors.
Row 61-72: Switch to Color D (Orange) and Color C (Lemon). Repeat Rows 2-4, following color changes according to chart and ending on a Row 3 (HDC Mesh) repeat. (Written Instructions below)
Row 73-84: Switch to Color E (Strawberry) and Color C (Lemon). Repeat Rows 2-4, following color changes according to chart and ending on a Row 3 (HDC Mesh) repeat.
Written Instructions
← Row 61 [RS]: (Orange) x 34, (Yellow) x 93, (Orange) x 34
→ Row 62 [WS]: (Orange) x 34, (Yellow) x 93, (Orange) x 34
← Row 63 [RS]: (Orange) x 34, (Yellow) x 93, (Orange) x 34
→ Row 64 [WS]: (Orange) x 35, (Yellow) x 91, (Orange) x 35
← Row 65 [RS]: (Orange) x 35, (Yellow) x 91, (Orange) x 35
→ Row 66 [WS]: (Orange) x 36, (Yellow) x 89, (Orange) x 36
← Row 67 [RS]: (Orange) x 36, (Yellow) x 89, (Orange) x 36
→ Row 68 [WS]: (Orange) x 37, (Yellow) x 87, (Orange) x 37
← Row 69 [RS]: (Orange) x 38, (Yellow) x 85, (Orange) x 38
→ Row 70 [WS]: (Orange) x 38, (Yellow) x 85, (Orange) x 38
← Row 71 [RS]: (Orange) x 39, (Yellow) x 83, (Orange) x 39
→ Row 72 [WS]: (Orange) x 40, (Yellow) x 81, (Orange) x 40
← Row 73 [RS]: (Pink) x 42, (Yellow) x 77, (Pink) x 42
→ Row 74 [WS]: (Pink) x 44, (Yellow) x 73, (Pink) x 44
← Row 75 [RS]: (Pink) x 46, (Yellow) x 69, (Pink) x 46
→ Row 76 [WS]: (Pink) x 48, (Yellow) x 65, (Pink) x 48
← Row 77 [RS]: (Pink) x 51, (Yellow) x 60, (Pink) x 50
→ Row 78 [WS]: (Pink) x 53, (Yellow) x 54, (Pink) x 54
← Row 79 [RS]: (Pink) x 57, (Yellow) x 48, (Pink) x 56
→ Row 80 [WS]: (Pink) x 59, (Yellow) x 42, (Pink) x 60
← Row 81 [RS]: (Pink) x 64, (Yellow) x 34, (Pink) x 63
→ Row 82 [WS]: (Pink) x 70, (Yellow) x 20, (Pink) x 71
← Row 83 [RS]: (Pink) x 161
→ Row 84 [WS]: (Pink) x 161
SKY
Note: Each of these color changes will end on a Row 3 (HDC Mesh) repeat.
Row 85-96: Switch to Color D (Orange). Repeat Rows 2-4.
Row 97-108: Switch to Color E (Strawberry). Repeat Rows 2-4.
Row 109-114: Switch to Color F (Grape). Repeat Rows 2-4.
Row 115-120: Switch to Color D (Orange). Repeat Rows 2-4.
Row 121-132: Switch to Color F (Grape). Repeat Rows 2-4.
Row 133-138: Switch to Color E (Strawberry). Repeat Rows 2-4.
Row 139-150: Switch to Color F (Grape). Repeat Rows 2-4.
Fasten off and weave ends.
Finishing
- It is recommended that you block your finished Summer Nights Throw.
- Optional Fringe: Add fringe to the top and bottom edges of your piece.
Final Thoughts
I hope you love the Summer Night Throw Blanket as much as you loved the ruana. Be sure to share your photos and tag me on Instagram @craftingforweeks so I can check out your work. I love seeing all your makes!
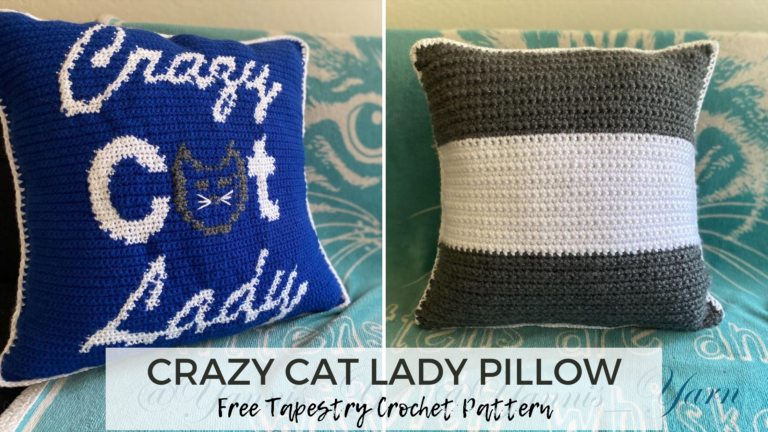
If you’re looking for some more color work projects to play with check out the Love Leopard Beanie or the Crazy Yarn Lady Pillow as well!
Until next time, Happy Crafting!
Kelsie


I have both the Summwr Nights Ruana and Blanket patterns and I noticed they have the same yarn requirements even though they are much different sizes. My daughter made the Ruana and came up short on at least 3 colors. I want to make the blanket and it is larger than the Ruana and I don’t know how much yarn I will be short. Please, is there an update I missed? Thank you.
They require the same number of skeins, but you will have different amounts leftover from each. Gauge/tension differences can definitely change the yarn requirements for a project this size. While I was able to make the ruana with the yardage listed and using scraps for fringe, others have mentioned they needed extra skeins of both Chocolate and Grape. The blanket yardage is based on averages of tester notes.